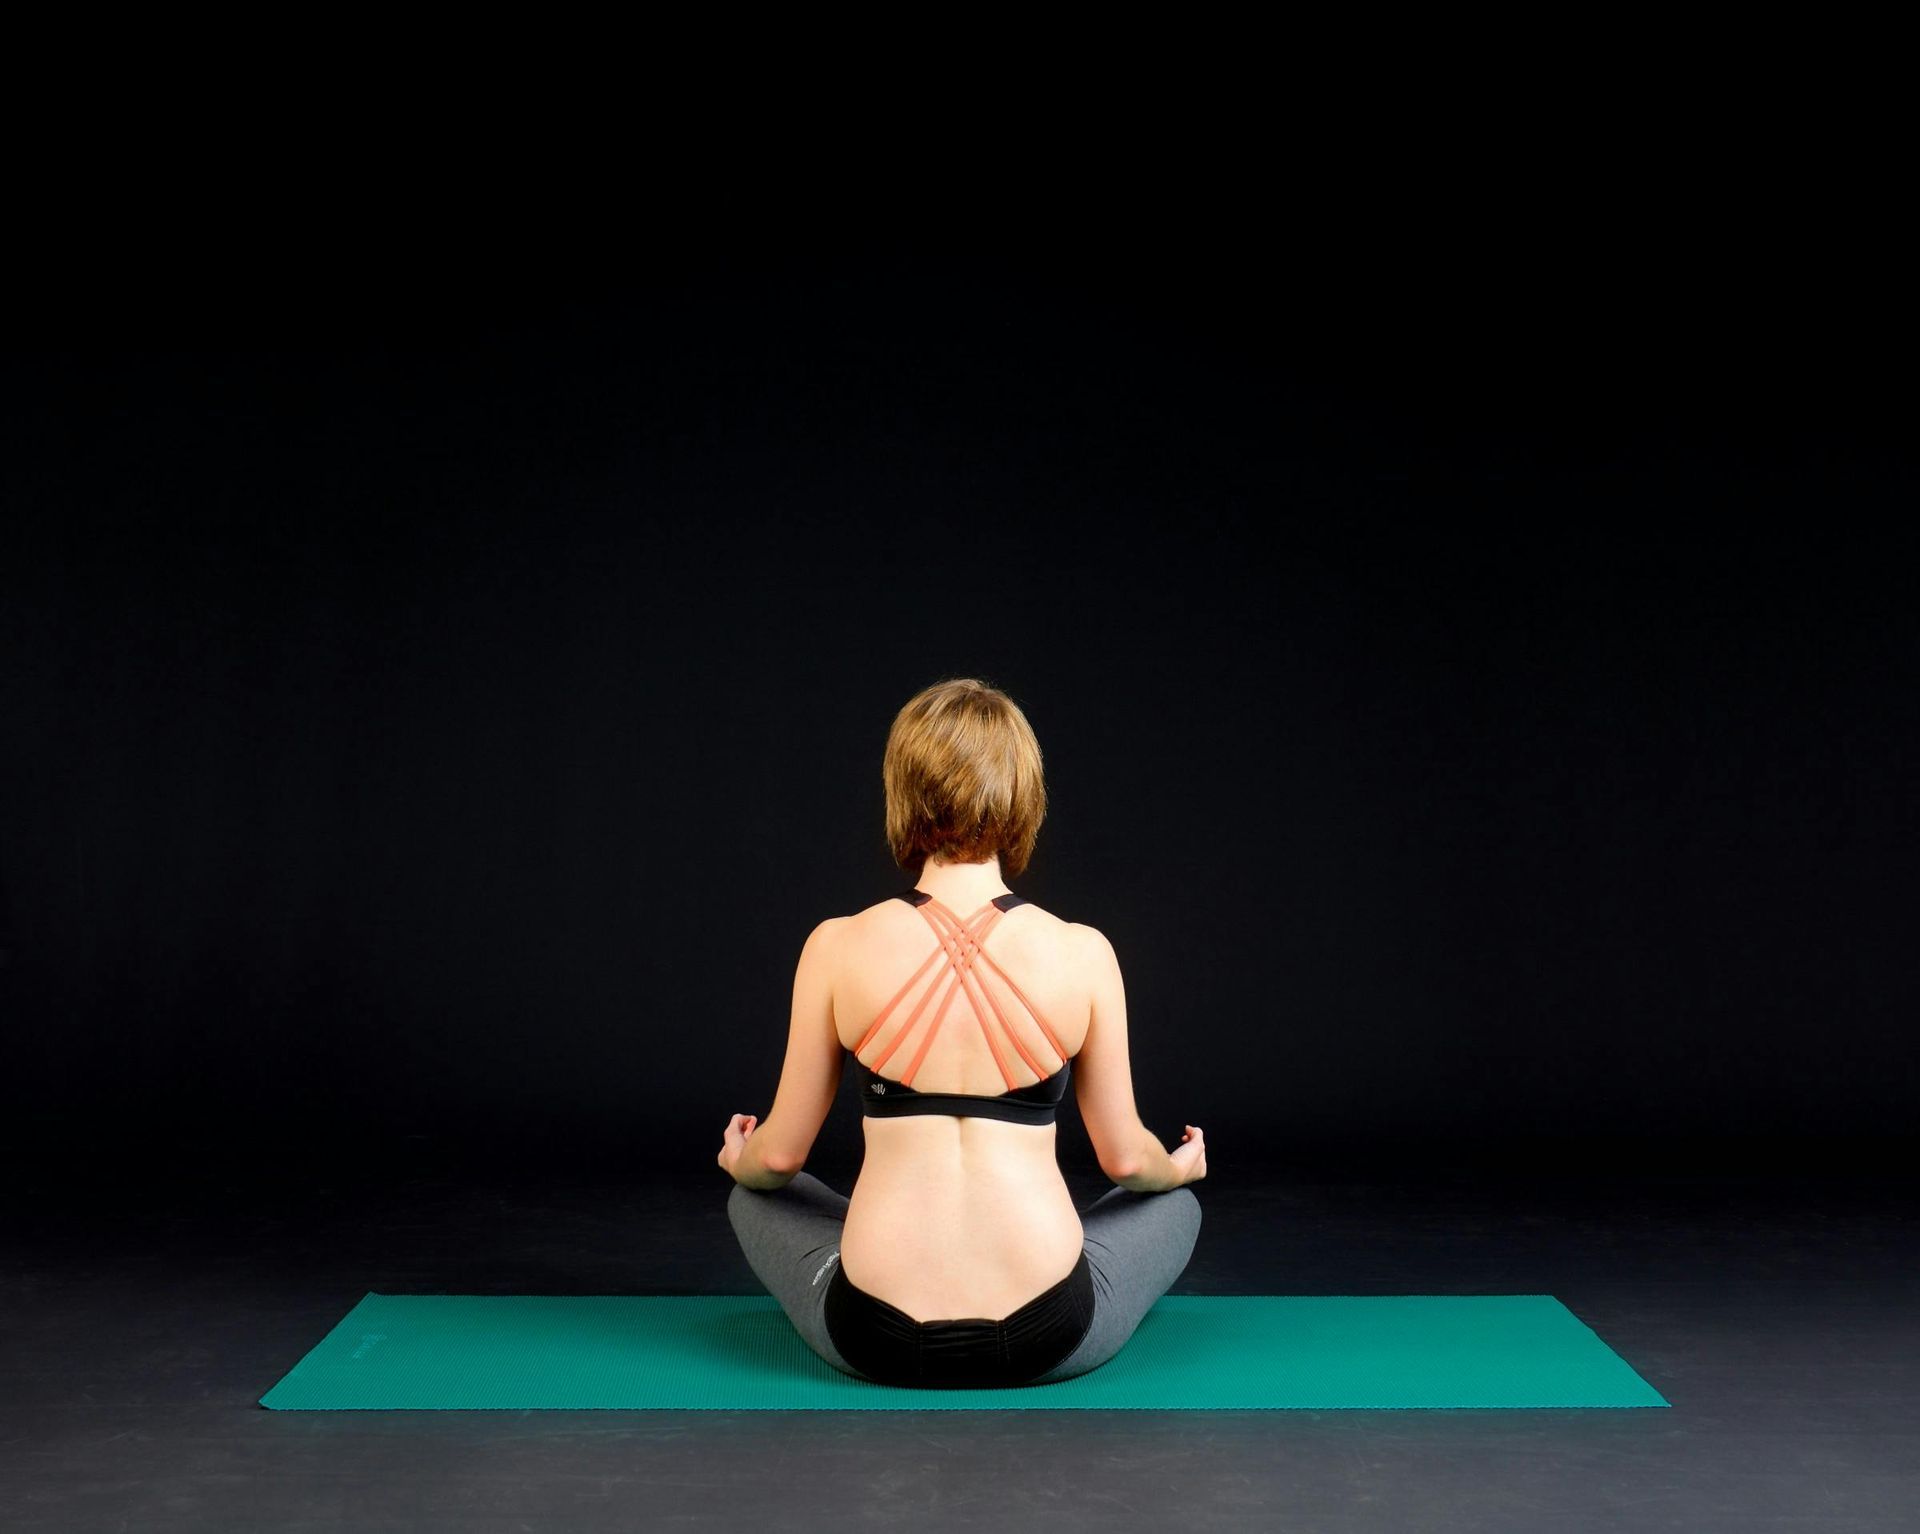
Yoga for Pregnancy: Poses to Help You Stay Calm, Strong, and Flexible
Jason Keigher • October 7, 2024
Yoga is an excellent form of exercise for pregnant women, providing both physical and mental benefits. It helps maintain strength and flexibility, improves balance, reduces pregnancy-related discomforts, and promotes relaxation and mental clarity. I recommend incorporating prenatal yoga into your fitness routine to support a healthy pregnancy and prepare your body for labor and delivery.
Benefits of Prenatal Yoga
- Improves Flexibility and Strength: Yoga stretches and strengthens the muscles used during pregnancy and childbirth, including the core, back, and pelvic floor muscles. This can help alleviate common pregnancy discomforts such as lower back pain and sciatica.
- Reduces Stress and Anxiety: Deep breathing and relaxation techniques practiced in yoga help calm the mind, reduce anxiety, and improve overall mood. This mental clarity can be particularly beneficial as you prepare for labor.
- Enhances Balance and Stability: As your belly grows, your center of gravity shifts, affecting your balance. Yoga poses help improve stability and coordination, reducing the risk of falls.
- Encourages Better Posture: Prenatal yoga emphasizes alignment and posture, helping to counteract the tendency to slouch or overarch the back during pregnancy.
- Prepares for Labor and Delivery: Yoga teaches breathing techniques, body awareness, and relaxation methods that are invaluable during labor. Certain poses help open the pelvis and prepare the body for delivery.
Recommended Yoga Poses for Pregnancy
- Cat-Cow Stretch (Marjaryasana-Bitilasana):
- How It Helps: This gentle flow helps relieve tension in the spine and improves flexibility in the back and abdominal muscles.
- How to Do It: Start on your hands and knees with your wrists directly under your shoulders and knees under your hips. Inhale as you arch your back and look up (Cow Pose), then exhale as you round your back and tuck your chin to your chest (Cat Pose). Repeat for several breaths.
- Child’s Pose (Balasana):
- How It Helps: A resting pose that gently stretches the lower back, hips, and thighs, relieving tension and promoting relaxation.
- How to Do It: Kneel on the floor with your knees apart and big toes touching. Sit back on your heels and extend your arms forward, lowering your chest towards the floor. Rest your forehead on the mat and breathe deeply.
- Warrior II (Virabhadrasana II):
- How It Helps: Strengthens the legs, core, and pelvic muscles while improving balance and stability.
- How to Do It: Stand with your feet wide apart. Turn your right foot out 90 degrees and bend your right knee over your ankle, keeping your left leg straight. Extend your arms out to the sides, palms down, and gaze over your right hand. Hold for a few breaths, then switch sides.
- Squat Pose (Malasana):
- How It Helps: Opens the hips, strengthens the legs, and promotes optimal positioning for the baby.
- How to Do It: Stand with your feet slightly wider than hip-width apart, toes pointing out. Lower into a squat, bringing your hands to prayer position in front of your chest. Use your elbows to gently press your knees apart. Hold for several breaths.
- Pigeon Pose (Eka Pada Rajakapotasana):
- How It Helps: Stretches the hip flexors and relieves lower back tension.
- How to Do It: From all fours, bring your right knee forward and place it behind your right wrist. Extend your left leg back, keeping the hips square. Lower your chest forward and breathe deeply. Repeat on the other side.
- Bound Angle Pose (Baddha Konasana):
- How It Helps: Opens the hips, stretches the inner thighs, and improves circulation to the pelvic region.
- How to Do It: Sit on the floor with your knees bent and the soles of your feet touching. Hold your feet with both hands and gently press your knees towards the floor. Sit up tall and breathe deeply.
Tips for Practicing Yoga Safely During Pregnancy
- Modify Poses as Needed: As your belly grows, you may need to modify poses for comfort and safety. Use props like yoga blocks, bolsters, and blankets to support your body.
- Avoid Deep Twists and Backbends: Avoid poses that compress the abdomen, deep twists, and intense backbends.
- Focus on Gentle Movements: Choose gentle, fluid movements that promote relaxation and flexibility.
- Stay Hydrated: Drink water before, during, and after your practice to stay hydrated.
- Listen to Your Body: If a pose feels uncomfortable or causes pain, skip it and try a modified version or different pose.
How I Can Support Your Prenatal Yoga Practice
I specialize in prenatal yoga, providing personalized guidance to help you enjoy a safe and effective practice. I offer personal training sessions that match your fitness level and pregnancy stage, ensuring you feel calm, strong, and flexible throughout your journey.
Contact Me Today!
Schedule a free consultation to learn how I can benefit you during pregnancy.
Most people return to exercise the wrong way after an injury. They either: Do nothing for too long or Jump back into workouts that caused the problem in the first place Both lead to the same outcome: You never fully recover. The Problem With “Going Back to Normal” After an injury, your body changes. You may have: Reduced mobility Weak stabilizing muscles Altered movement patterns Pain with certain positions Going back to your old workouts ignores all of that. That’s why injuries come back—or never fully go away. What Adaptive Exercise Does Differently Adaptive exercise rebuilds your strength based on your current capacity—not your past ability. That means: Working within pain-free ranges Reintroducing movement gradually Rebuilding stability before adding load Progressing in a controlled, structured way This is how you actually move forward. Step 1: Restore Control Before strength, you need control. That includes: Joint positioning Muscle activation Coordination If you skip this, you’re just layering strength on top of dysfunction. Step 2: Rebuild Stability Stability is what protects your joints under load. Without it: Knees collapse Shoulders compensate Lower back takes over Adaptive training focuses on: Controlled reps Proper alignment Eliminating compensation patterns Step 3: Gradual Load Progression Only after control and stability improve do we increase the load. This is where most people rush—and reinjure themselves. Progression should be: Measured Intentional Based on how your body responds Not based on what you “used to lift.” Pain Is Feedback, Not Something to Push Through One of the biggest mistakes people make: Ignoring pain. In adaptive training: Pain guides adjustments Movements are modified immediately Exercises are replaced when needed You don’t push through pain. You train around it—and improve it. What This Looks Like in Real Training Instead of forcing exercises, we adjust them: Squats become supported or range-limited Pressing movements change angle or grip Deadlifts are modified for positioning and load Core work focuses on stability, not strain Everything is built around what your body can do today. The Result Done correctly, adaptive exercise leads to: Reduced pain Improved movement quality Increased strength Long-term durability Not temporary progress— sustainable results. The Bottom Line Injuries don’t mean you stop training. They mean you need to train differently. Adaptive exercise gives you a way to keep moving forward—without setbacks. Work With Me At JasonKeigher.com , I specialize in one-on-one adaptive personal training for clients dealing with injuries, limitations, and real-world constraints. No generic programs. No unnecessary risk. Just structured, intelligent training that works.

Running is one of the most accessible, effective, and transformative forms of exercise. You don’t need a gym membership, complicated equipment, or hours of free time. You just need a pair of shoes and a few minutes to get moving. As a certified personal trainer in Palm Springs, I work with clients of all ages and fitness levels—and running consistently proves itself as one of the best overall workouts for the body and mind. Whether you’re looking to improve your health, lose weight, build stamina, or simply feel better day-to-day, running offers powerful benefits you can start experiencing right away. 1. Running Improves Heart Health Running strengthens the cardiovascular system more efficiently than almost any other activity. With regular training, you’ll see improvements in: Lower resting heart rate Better circulation Reduced blood pressure Increased endurance A stronger heart also makes everyday activities feel easier—walking, climbing stairs, and even long workdays take less out of you. 2. Running Burns a High Number of Calories If your goal is fat loss, running is one of the quickest ways to make progress. It burns more calories per minute than most forms of cardio and continues to boost your metabolism after your workout. This makes it an ideal choice for anyone who wants effective results in a limited amount of time. 3. Running Builds Strong, Toned Legs Your legs do the work, but the entire lower body benefits: Glutes Hamstrings Quads Calves Running develops strength, definition, and stability—helping you move better and feel more athletic. 4. Running Strengthens Your Core A steady, controlled running stride requires core activation with every step. Over time, this helps: Improve posture Reduce back pain Increase balance Tighten abdominal muscles Your core becomes stronger without doing a single crunch. 5. Running Boosts Mental Health One of the biggest benefits happens outside the body. Running is proven to: Reduce stress Improve sleep Increase mental clarity Boost mood Elevate confidence Lower symptoms of anxiety and depression Just 10–20 minutes can create a noticeable change in how you feel. 6. Running Improves Bone Density Unlike many cardio options, running is weight-bearing. The impact stimulates bone growth and helps prevent age-related bone loss. This makes it especially valuable as we get older. 7. Running Is Convenient and Low-Cost No schedule restrictions. No equipment. No monthly fees. You can run: In your neighborhood At a park On a treadmill On a track While traveling It’s the simplest fitness plan to maintain long-term. 8. Running Builds Discipline and Consistency Running teaches you how to push through resistance, build habits, and set achievable goals. Those small wins stack up quickly and often lead to greater confidence in other areas of life. Beginner-Friendly Running Tip If you’re new to running, start with run/walk intervals : 1 minute jogging → 1–2 minutes walking Repeat for 15–20 minutes. This is the safest, most effective way to build endurance without burnout or injury. Ready to Start Running Smarter? Whether you're new to running or returning after a break, I can help you build a safe, effective running program based on your goals, fitness level, and schedule. As a certified personal trainer with decades of experience, I focus on proper form, conditioning, and long-term success. If you'd like personalized coaching or a structured running plan, reach out anytime. Jason Keigher, CPT – Palm Springs Personal Trainer Call: 760-558-5858

When it comes to functional strength training and total-body fitness, few tools are as powerful and adaptable as TRX suspension training . As a personal trainer in Palm Springs , I use TRX to help clients improve strength, posture, and balance in a safe, low-impact way that delivers visible results. Whether you’re looking to tone up, build core stability, or enhance athletic performance, TRX training offers a smart, efficient, and versatile path to success. What Is TRX Suspension Training? TRX (Total Resistance Exercise) is a suspension system that uses two adjustable straps anchored to a secure point. Instead of relying on machines or heavy weights, you use your own body weight for resistance. By adjusting your angle or stance, you can easily make exercises more challenging or more supportive—making TRX ideal for all fitness levels. TRX training builds strength, stability, and mobility simultaneously. Because it’s a full-body approach, you’ll develop lean muscle, improve coordination, and strengthen your core with every movement. The Key Benefits of TRX Training As a certified personal trainer in Palm Springs, I integrate TRX into many client programs because of its wide-ranging benefits: Total-Body Strength: TRX engages multiple muscle groups at once for a balanced, functional workout. Core Stability: Every TRX exercise challenges your core, improving posture and reducing back pain. Low-Impact & Joint-Friendly: Ideal for older adults or those recovering from injury—TRX builds strength without high-impact stress. Enhanced Balance & Coordination: The suspension system requires control and focus, helping improve movement quality. Efficient Workouts: In just 30 minutes, you can target strength, endurance, and flexibility. Portable and Versatile: TRX can be set up at home, outdoors, or in-studio—perfect for my in-home personal training sessions . TRX Exercises That Deliver Results Here are a few effective TRX movements I often include in my programs for Palm Springs personal training clients: TRX Row – Strengthens the back and arms while improving posture. TRX Chest Press – Builds upper-body power and shoulder stability. TRX Plank to Pike – Tightens the core and enhances control. TRX Squat with Y-Raise – Combines lower-body strength with postural training. TRX Hamstring Curl – Activates glutes and hamstrings for strong, stable hips. TRX Single-Leg Lunge – Improves balance and coordination. TRX Mountain Climbers – Adds a cardio component while sculpting the core. TRX T-Raises and W-Raises – Strengthen the upper back and improve shoulder posture. Each of these can be modified to match your current ability and goals, progressing safely as your strength increases. How I Incorporate TRX in My Personal Training TRX is one of my go-to tools for functional strength and balance training. I use it to help clients of all ages—especially those who want to: Improve stability and coordination Build lean muscle without bulk Strengthen the core and improve posture Increase endurance and overall fitness My Palm Springs personal training programs are built around individualized assessment, smart progression, and ongoing support. I bring the TRX system directly to your location—home, park, or gym—so you can get professional-level results without needing a full gym setup. Why Work with a TRX Personal Trainer in Palm Springs When you train with me, you’ll get: A customized TRX program tailored to your goals and fitness level Professional coaching to ensure proper form and injury prevention Progressive workouts that build strength, balance, and mobility The convenience of in-home or outdoor training anywhere in the Palm Springs area Ongoing motivation, accountability, and measurable progress Get Started with TRX Training Today If you’re ready to experience the power of TRX suspension training in Palm Springs, I can help you get started the right way. Together, we’ll create a program designed to build your strength, improve your core stability, and enhance your overall movement quality. TRX training is efficient, effective, and perfect for clients of all fitness levels. Contact me today to schedule your free consultation—and discover how TRX can transform the way you move, feel, and perform.

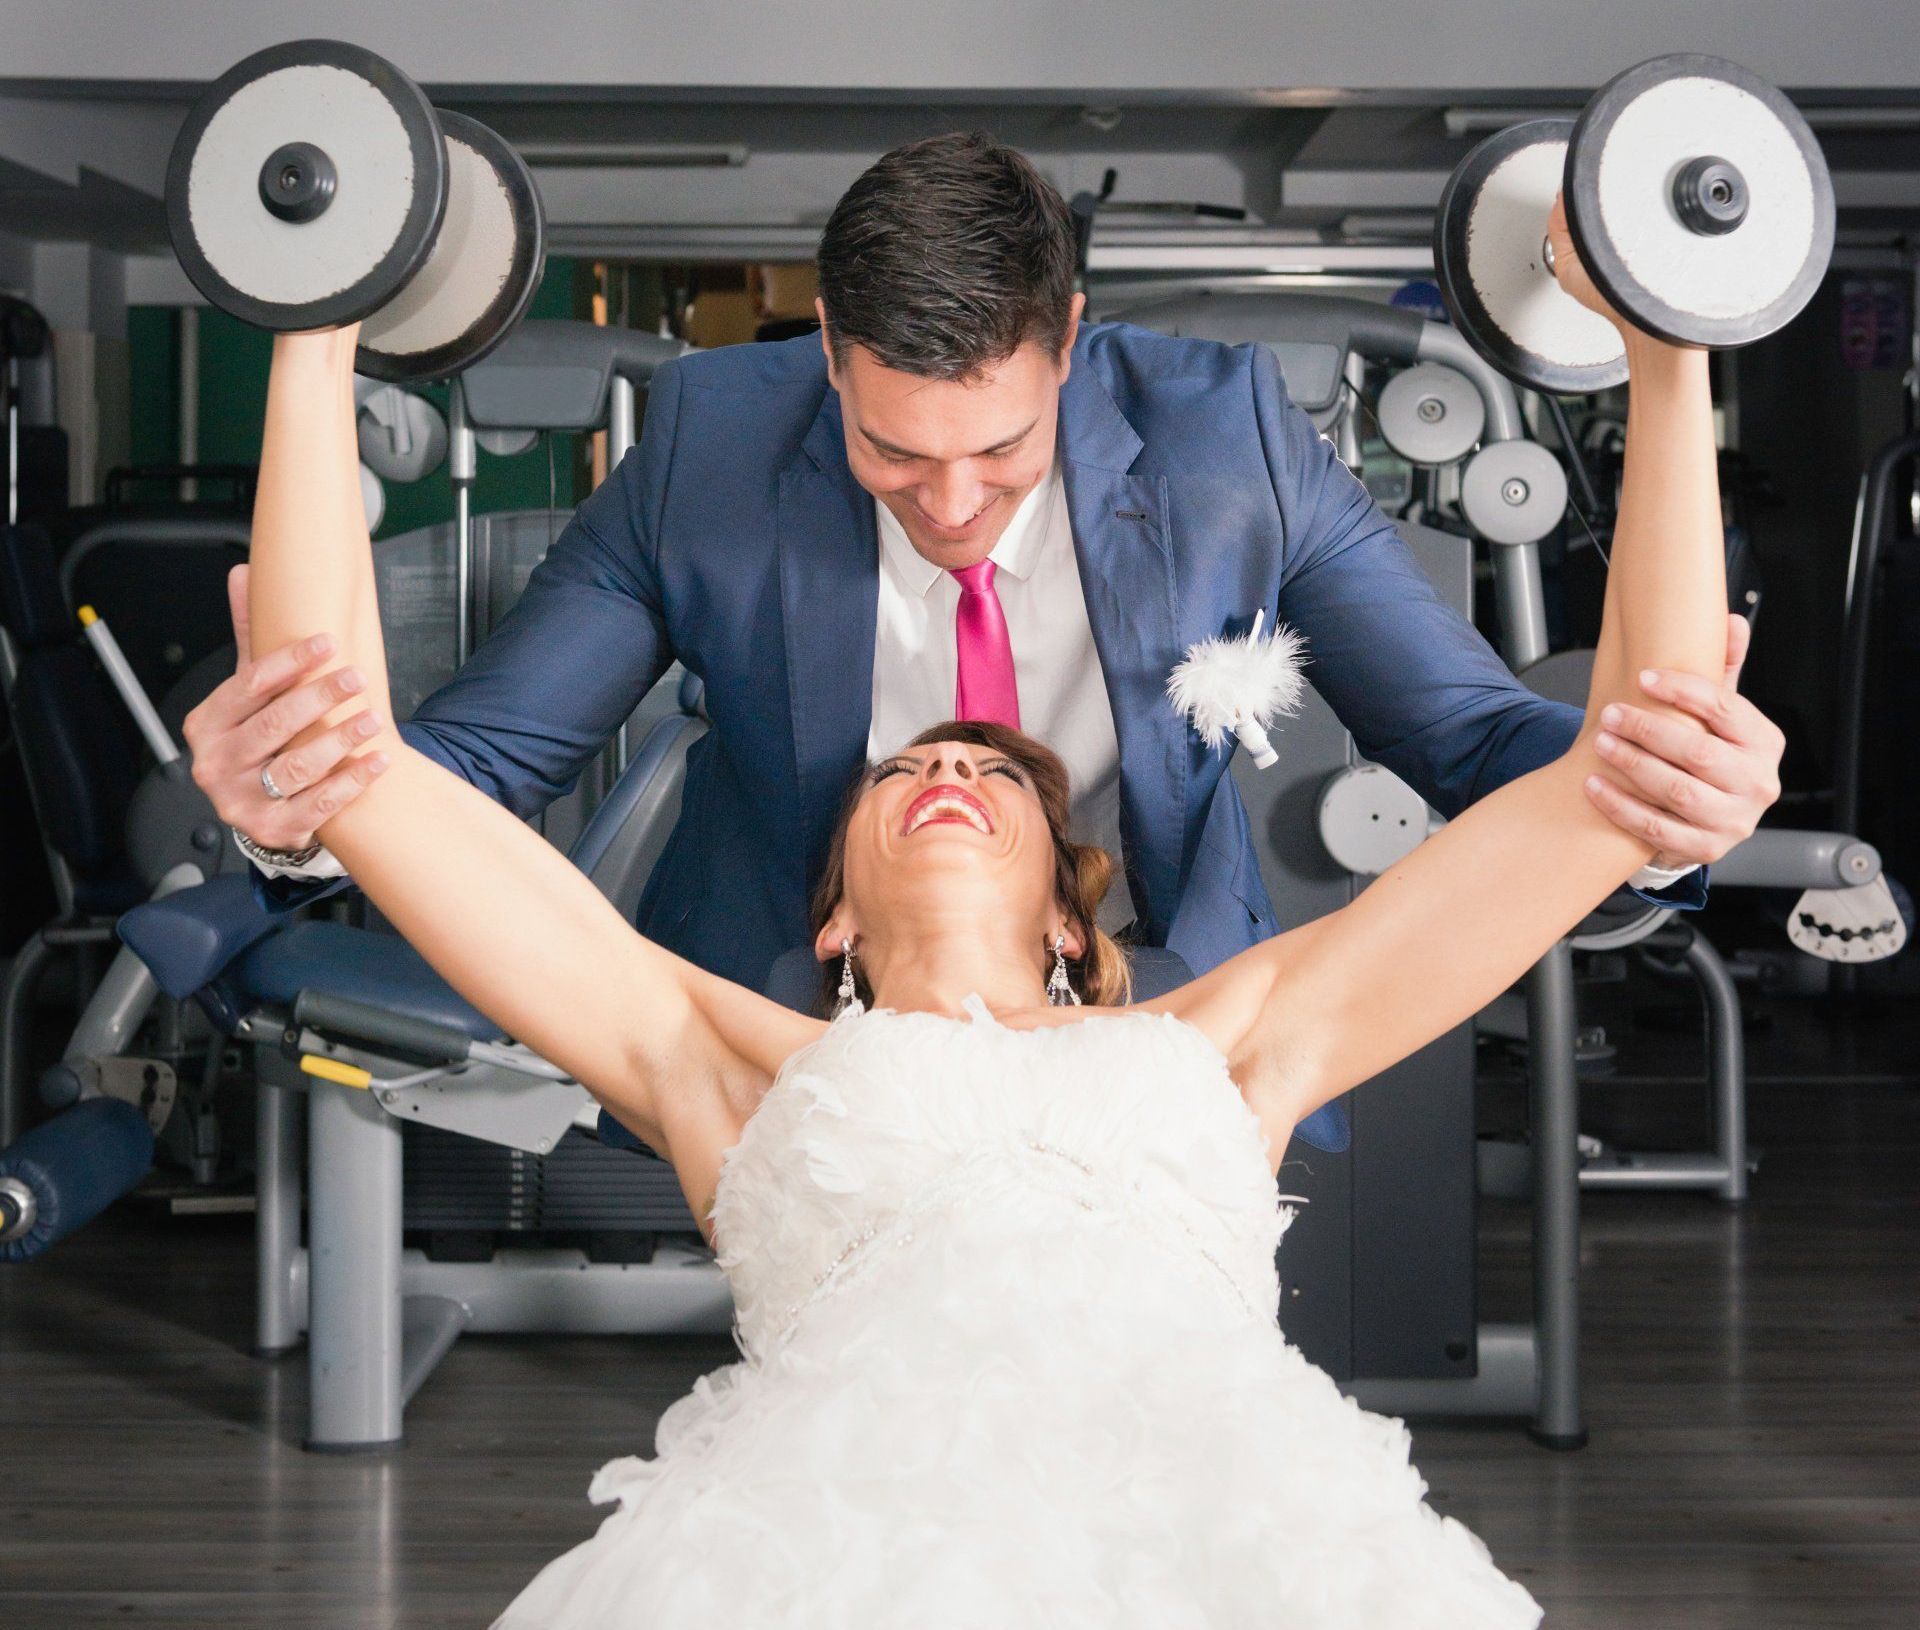
You’ve chosen the gown — maybe it’s fitted, strapless, low-back, or just more revealing than your everyday wear. Now all eyes (and cameras) will be on you. Hiring a personal trainer before your wedding isn’t about becoming a fitness fanatic. It’s about sculpting the areas that matter most, zipping up your dress with confidence, and walking into your big day looking as stunning as you’ve imagined. Sculpt the Areas That Matter Most Every bride has specific concerns — arms, back, waist, hips, and glutes. A dress doesn’t lie, especially when it hugs the body or exposes the upper half. Bridal-focused personal training targets exactly what you want to improve, so you look tighter, more toned, and balanced in your gown. This isn’t random exercise. It’s strategic, visual, and effective. Drop Inches, Not Energy Weddings are exhausting enough without starving yourself or overtraining. Instead of chasing quick weight loss, a trainer helps you lose inches the right way — through smart strength training and body recomposition. You’ll feel leaner, stand taller, and maintain your energy as the big day gets closer. A Better Fit at Every Fitting Alterations can only do so much. If your body is changing in a good way — waist shrinking, arms tightening, posture improving — your dress will fit cleaner and smoother. No pulling, tugging, or last-minute crash dieting. Just steady results that make each fitting easier and more exciting. Confidence That Shows in Every Photo A sculpted back, defined shoulders, or visible waistline doesn’t just look good — it changes how you carry yourself. You’ll walk taller, move with more grace, and show up stronger in your photos. That posture and confidence come from more than a great dress — it comes from training for it. Real Results, No Guesswork Your timeline, your body, your dress — all factored into a custom plan that works. Whether you’ve got six months or six weeks, you’ll know exactly what to do, how to do it, and when to expect results. No guessing. Just visible, measurable progress designed to show up when it counts. Bottom Line: Looking great in your dress isn’t about chasing perfection. It’s about making your hard work show. With a personal trainer focused on bridal fitness, you’ll walk into your wedding stronger, leaner, and 100% ready to own that dress — and every camera angle that comes with it. Let’s get started today! Call 760-558-5858 to schedule your free consultation.

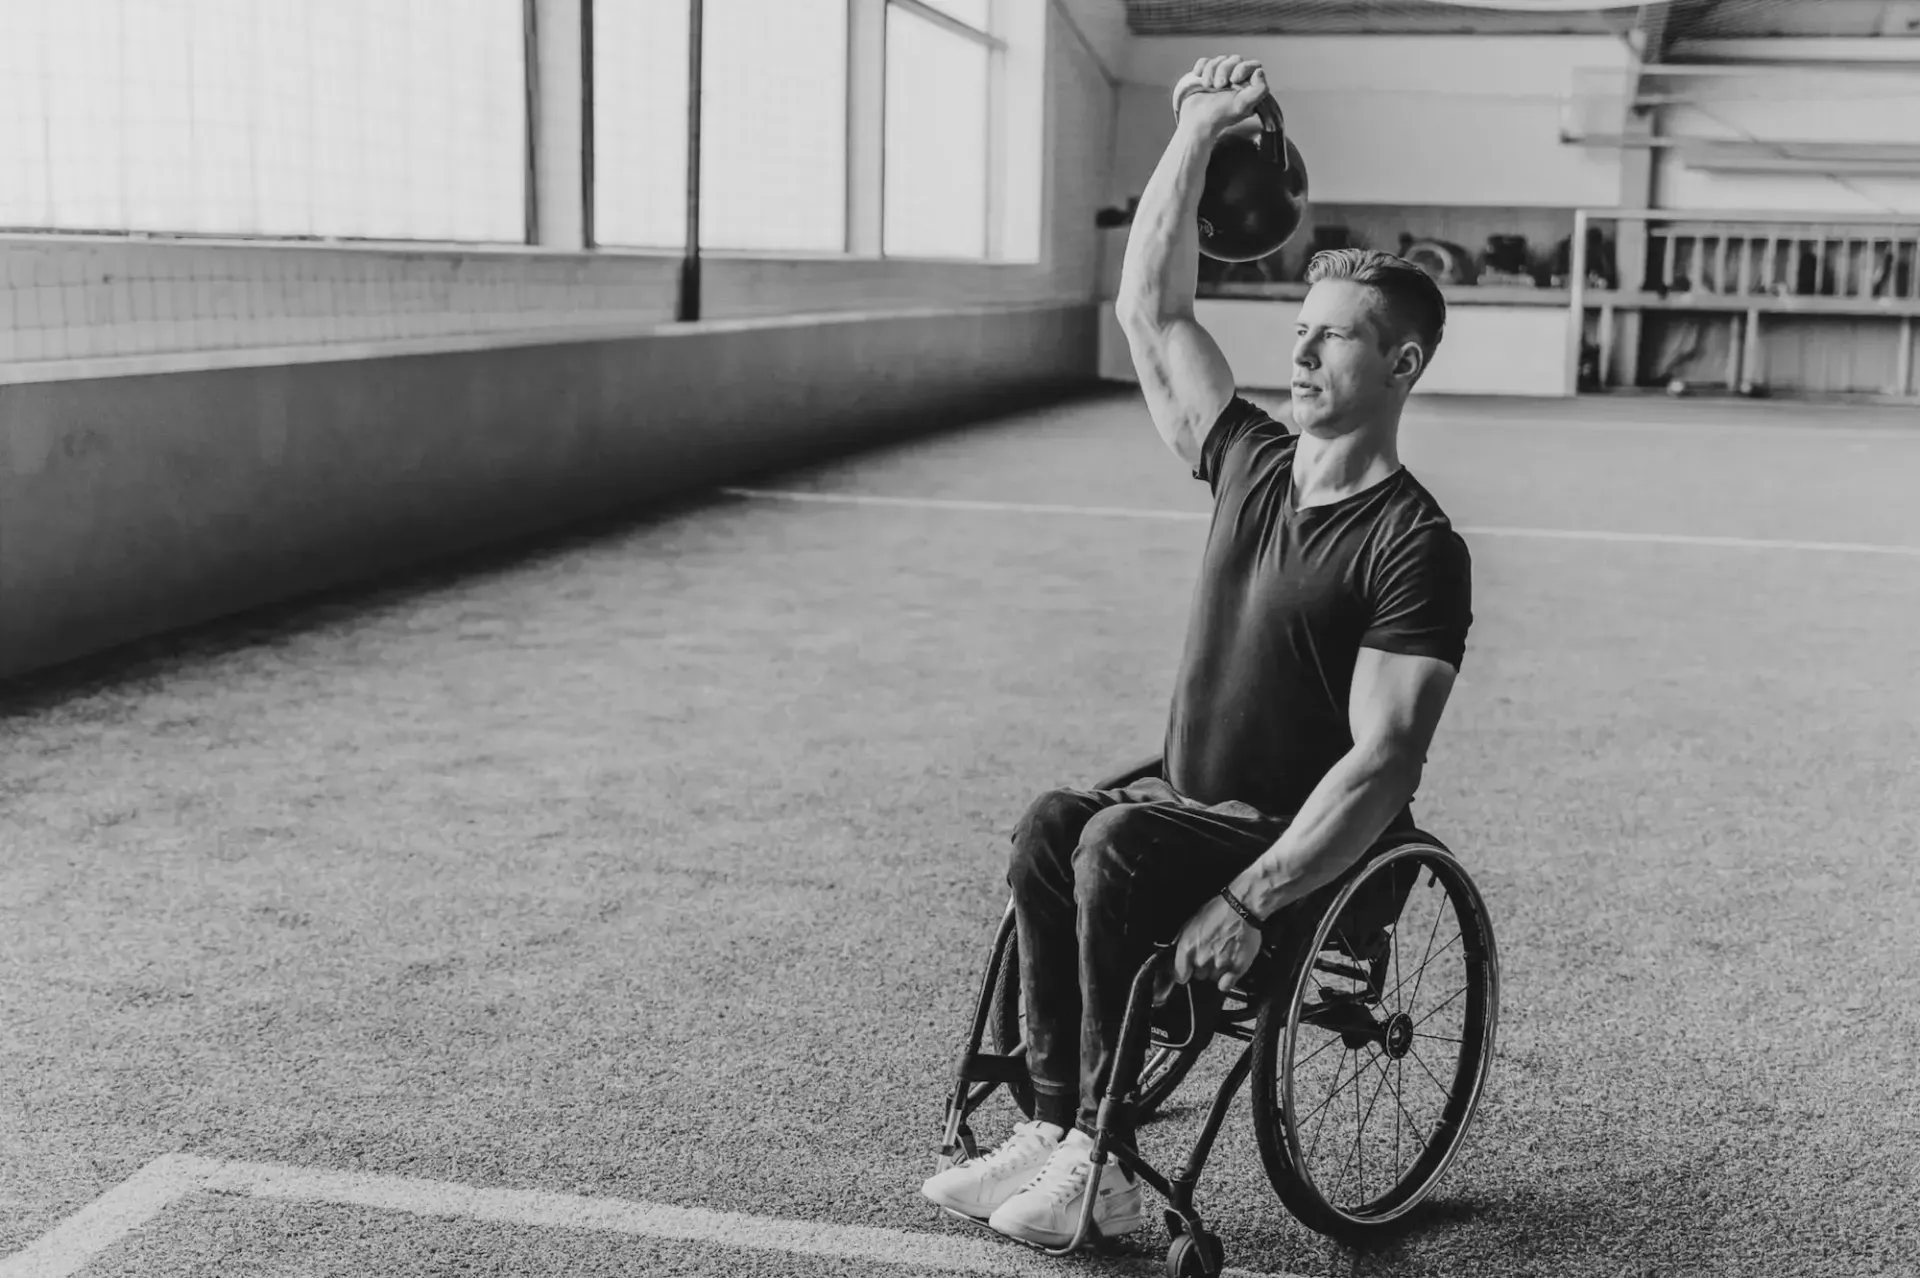
Kettlebell training has gained significant popularity over the years—and for good reason. This unique piece of equipment offers a versatile, full-body workout that improves strength, mobility, endurance, and even cardiovascular health. Whether you’re a seasoned fitness enthusiast or just starting your journey, kettlebells are a powerful tool to include in your workout routine. In this article, we’ll explore the origins of kettlebell training, its benefits, and a sample workout to get you started. The Origins of Kettlebell Training Kettlebells date back to 18th-century Russia, where they were initially used as counterweights for measuring goods. Over time, they became a staple for physical training, particularly among Russian strongmen and military personnel. Their compact, cast-iron design allowed for dynamic movements that traditional weights couldn’t replicate, laying the foundation for modern kettlebell training. Why Choose Kettlebell Workouts? Kettlebells aren’t just a trendy fitness tool—they deliver proven results. Here are some of the key benefits: 1. Improved Functional Strength Unlike traditional dumbbells or machines, kettlebells engage multiple muscle groups simultaneously. Movements like the kettlebell swing mimic everyday motions, such as lifting or bending, making them ideal for building strength that translates to daily life. 2. Enhanced Cardiovascular Fitness High-intensity kettlebell exercises elevate your heart rate, offering a cardio component alongside strength training. A study published in the Journal of Strength and Conditioning Research found that a 20-minute kettlebell workout can burn up to 400 calories while improving aerobic capacity. 3. Increased Mobility and Flexibility Many kettlebell exercises involve dynamic, full-body movements that enhance joint mobility and flexibility. The Turkish get-up, for instance, challenges your range of motion while building strength. 4. Core Engagement Kettlebell training activates the core muscles with nearly every movement. Exercises like the kettlebell windmill or swing are particularly effective at building core stability and strength. 5. Time Efficiency Kettlebell workouts combine strength, endurance, and cardio into a single session, making them perfect for busy schedules. Getting Started: A Beginner’s Kettlebell Workout If you’re new to kettlebell training, focus on mastering form before increasing weight. Here’s a simple workout to target multiple muscle groups: Warm-Up (5 Minutes) Arm circles Bodyweight squats Hip bridges Cat-cow stretches Workout (Perform 3 Rounds) Kettlebell Deadlift (10 reps) Targets: Hamstrings, glutes, and lower back How: Stand with feet shoulder-width apart, kettlebell between your feet. Hinge at the hips, grip the kettlebell handle, and lift to a standing position. Kettlebell Swing (15 reps) Targets: Glutes, hamstrings, and core How: With feet shoulder-width apart, swing the kettlebell between your legs, then explosively thrust your hips forward to bring it to chest height. Goblet Squat (10 reps) Targets: Quads, glutes, and core How: Hold the kettlebell by the handle at chest height and perform a squat, keeping your chest upright. Overhead Press (8 reps per arm) Targets: Shoulders and triceps How: Press the kettlebell overhead with one arm, keeping your core engaged and wrist straight. Russian Twist (10 reps per side) Targets: Obliques How: Sit on the floor with knees bent, holding the kettlebell by the horns. Rotate your torso side-to-side while keeping your feet off the ground for an added challenge. Cool-Down (5 Minutes) Forward fold stretch Hip flexor stretch Shoulder rolls Safety Tips for Kettlebell Training Start Light: Use a lighter kettlebell until you’ve mastered proper form. Maintain Neutral Spine: Avoid rounding your back, especially during swings and deadlifts. Engage Your Core: This protects your lower back and improves stability. Consult a Trainer: If you’re unsure about your form, seek guidance from a certified trainer. Kettlebell training offers a unique combination of strength, endurance, and mobility benefits, making it an excellent addition to any fitness routine. With proper form and consistency, you’ll see improvements in your overall fitness and functional strength. Ready to give kettlebell training a try? Reach out to schedule a session and let’s incorporate this dynamic tool into your fitness journey. Sources McGill, S. M., & Marshall, L. W. (2012). Kettlebell Swing, Snatch, and Bottoms-Up Carry: Back and Hip Muscle Activation and Low Back Load. Journal of Strength and Conditioning Research. Farrar, R. E., Mayhew, J. L., & Koch, A. J. (2010). Oxygen cost of kettlebell swings. Journal of Strength and Conditioning Research. ACE Fitness. (2023). Benefits of Kettlebell Training.

As we age, maintaining our balance becomes crucial for daily activities and overall health. Falls are a significant concern for older adults, often leading to injuries and a decrease in independence. According to the CDC, one in four older adults falls each year, making balance training an essential part of any senior fitness routine.
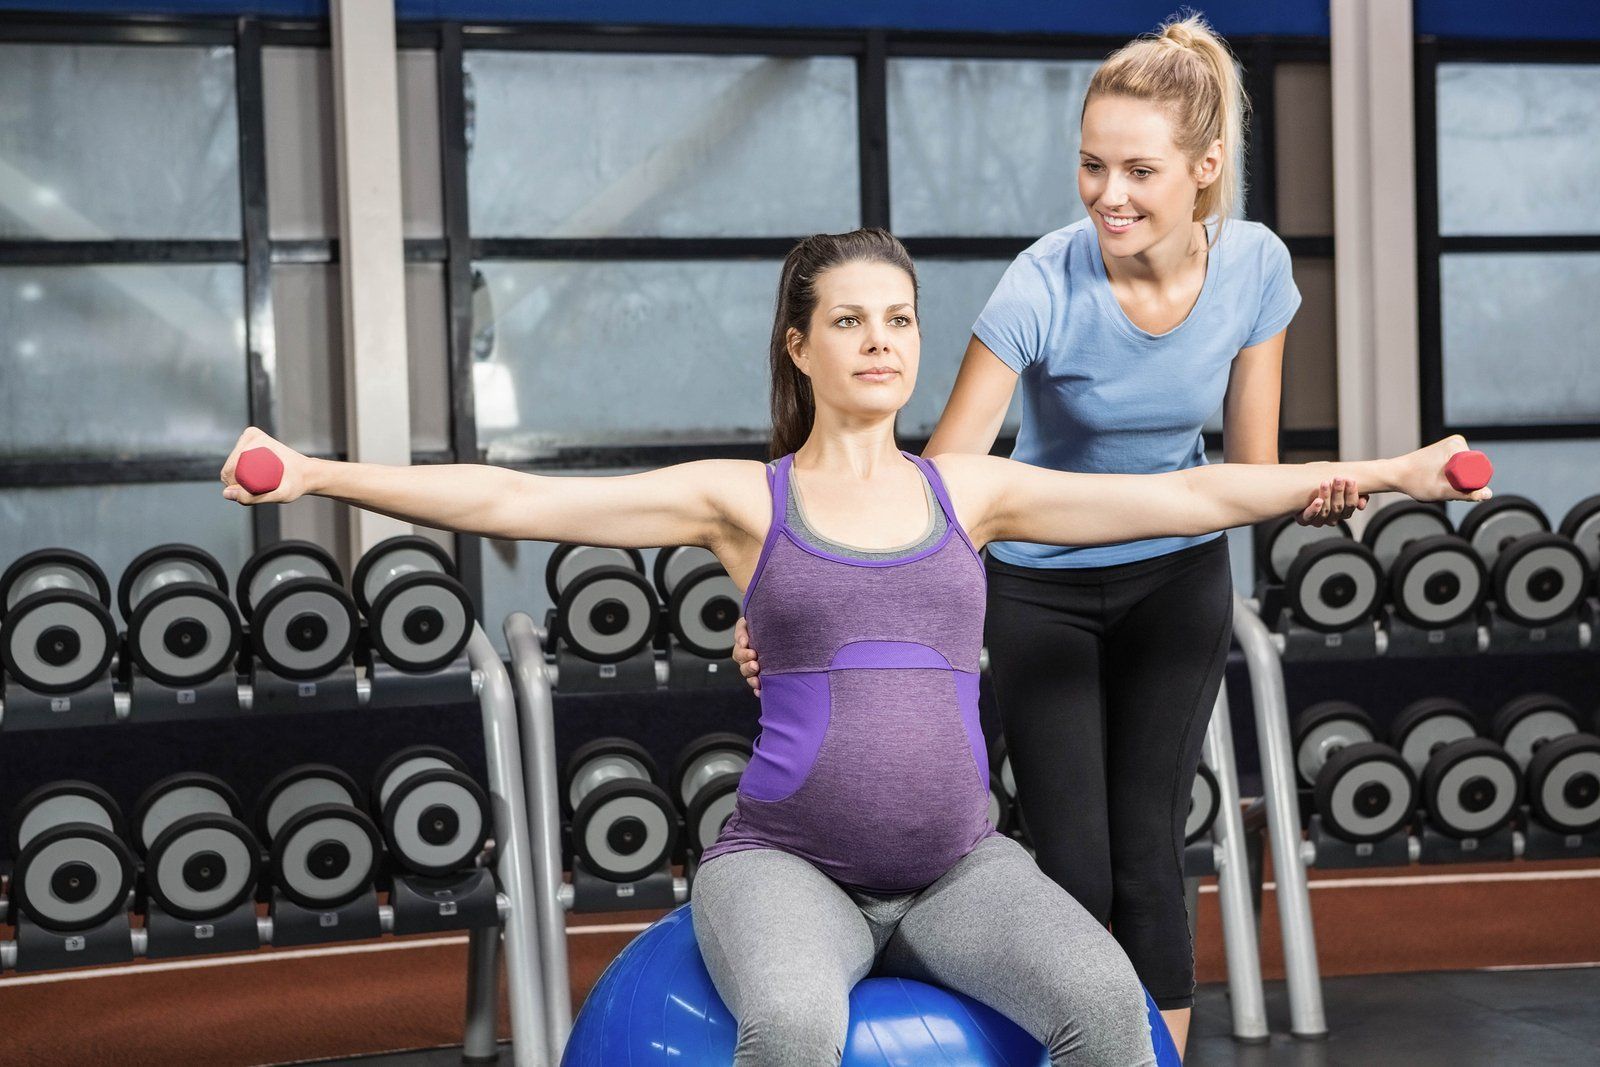
Labor is often described as a marathon, requiring both mental and physical stamina. Preparing your body for this intense experience through regular exercise can help increase your strength, endurance, and resilience, making labor and delivery smoother and more manageable. I focus on safe, targeted prenatal workouts that help you feel strong and prepared for the big day. Benefits of Exercise for Labor Preparation Increases Strength and Stamina: Labor and delivery require endurance and muscle strength, particularly in the core, back, and lower body. Regular exercise builds the strength needed to support active labor, reducing fatigue and improving your ability to push effectively. Improves Flexibility and Mobility: Stretching and flexibility exercises help keep your muscles relaxed and your joints mobile, making it easier to find comfortable positions during labor. This flexibility can also help reduce muscle tension and pain. Enhances Breathing and Relaxation Techniques: Cardiovascular activities, such as walking or swimming, help improve lung capacity and breathing efficiency, which is vital for managing contractions and staying calm during labor. Boosts Mental Resilience: Exercise is a proven way to manage stress and anxiety, helping you stay mentally prepared for labor. Activities like yoga and meditation encourage relaxation and positive thinking, both crucial for labor. Recommended Prenatal Workouts for Labor Preparation Squats: Squats help strengthen the muscles in your legs, hips, and pelvic floor, all of which play an essential role in supporting your body during labor. They also promote flexibility in the pelvic area, which can aid in the birthing process. How to Do Them: Stand with your feet shoulder-width apart, toes pointing slightly outward. Lower yourself as if sitting back into a chair, keeping your chest lifted and knees over your ankles. Hold for a few seconds and return to standing. Repeat 10-15 times. Pelvic Tilts: Pelvic tilts can help relieve back pain, strengthen the lower back and abdominal muscles, and prepare your body for labor by promoting optimal baby positioning. How to Do Them: Lie on your back with your knees bent and feet flat on the floor (or in a tabletop position). Tighten your abdominal muscles and tilt your pelvis upward, flattening your lower back against the floor. Hold for a few seconds, then release. Repeat 10-15 times. Prenatal Yoga: Yoga helps improve flexibility, balance, and muscle tone while promoting relaxation and deep breathing. Poses like the "Child’s Pose" and "Cat-Cow" are especially beneficial for easing tension in the back and preparing the body for labor. How to Do Them: Incorporate a prenatal yoga routine 2-3 times per week, focusing on gentle stretching, breath work, and poses that open the hips and pelvis. Walking: Walking is a low-impact cardiovascular exercise that keeps you active, boosts endurance, and encourages the baby to move into the correct position for birth. How to Do It: Aim for 30 minutes of walking at a moderate pace most days of the week. Wear supportive shoes and maintain good posture to avoid discomfort. Kegels: Strengthening the pelvic floor muscles with Kegels can help you maintain control during labor, support your growing uterus, and reduce the risk of tearing during delivery. How to Do Them: Tighten the muscles you use to stop the flow of urine, hold for 3-5 seconds, and then release. Repeat 10-15 times, several times a day. Breathing Exercises: Deep breathing exercises help you stay calm, focused, and relaxed during labor, improving oxygen flow to you and your baby. How to Do Them: Practice diaphragmatic breathing by inhaling deeply through your nose, expanding your belly, and exhaling slowly through your mouth. Repeat several times a day, especially during your workout sessions. Tips for Safe Prenatal Exercise Consult Your Healthcare Provider: Before starting any new exercise routine, get clearance from your doctor or midwife to ensure the activities are safe for you and your baby. Stay Hydrated and Avoid Overheating: Drink plenty of water and exercise in a cool, ventilated environment to prevent overheating. Modify as Needed: As your pregnancy progresses, modify exercises to accommodate your growing belly and any discomfort. Listen to Your Body: If you feel any pain, dizziness, or shortness of breath, stop exercising immediately and consult your healthcare provider. How I Can Help Prepare You for Labor I am a expert in prenatal fitness, specializing in exercises that build the strength, endurance, and mental focus needed for a positive labor experience. I create personalized workout plans that match your fitness level and goals, ensuring you feel prepared and confident as you approach your due date. Contact Me Today! Schedule a free consultation to learn how my tailored prenatal fitness programs can help you prepare your body for a healthy, active labor.

Proper nutrition plays a crucial role in a mother’s postpartum recovery and the production of healthy breast milk. After giving birth, your body needs adequate nutrients to heal, regain strength, and provide nourishment for your baby. As a trainer I emphasize the importance of a balanced diet to support both recovery and the unique nutritional needs of breastfeeding mothers. Key Nutrients for Postpartum Recovery and Lactation Protein Why It’s Important: Protein is essential for repairing tissues, rebuilding muscle strength, and supporting overall healing after childbirth. It is also vital for producing breast milk. Sources: Lean meats, poultry, fish, eggs, dairy products, beans, lentils, nuts, and seeds. Calcium Why It’s Important: Calcium is crucial for maintaining strong bones and teeth, especially since breastfeeding can deplete calcium reserves. It is also essential for your baby’s bone development. Sources: Dairy products (milk, yogurt, cheese), fortified plant-based milk (almond, soy), leafy green vegetables, tofu, and almonds. Iron Why It’s Important: Iron helps replenish red blood cells, which can be lost during childbirth. It also supports energy levels and helps prevent postpartum anemia. Sources: Lean red meat, poultry, fish, beans, lentils, spinach, and iron-fortified cereals. Omega-3 Fatty Acids Why It’s Important: Omega-3s, particularly DHA, are important for brain health, mood regulation, and the development of your baby’s brain and eyes if you are breastfeeding. Sources: Fatty fish (like salmon and sardines), walnuts, flaxseeds, chia seeds, and omega-3 fortified eggs. Fiber Why It’s Important: High-fiber foods aid digestion, prevent constipation, and help maintain healthy blood sugar levels, which can fluctuate after giving birth. Sources: Whole grains (brown rice, oats, quinoa), fruits, vegetables, beans, and legumes. Vitamin D Why It’s Important: Vitamin D aids calcium absorption and supports bone health for both mother and baby. It also plays a role in immune function. Sources: Sun exposure, fatty fish, fortified dairy or plant-based milk, and egg yolks. Hydration Why It’s Important: Staying hydrated is essential for milk production, maintaining energy levels, and overall health. Breastfeeding mothers should aim for an extra 700 ml (about 3 cups) of fluid per day. Sources: Water, herbal teas, soups, and water-rich foods like fruits and vegetables. Sample Meal Plan for Postpartum Nutrition Breakfast : Oatmeal with Berries and Almonds Ingredients : Rolled oats, fresh berries (blueberries, strawberries), a handful of almonds, a drizzle of honey, and a splash of milk or plant-based milk. Benefits : Provides fiber, protein, healthy fats, and antioxidants to support energy levels and milk production. Mid-Morning Snack : Greek Yogurt with Honey and Chia Seeds Ingredients : Greek yogurt, a teaspoon of honey, and a sprinkle of chia seeds. Benefits : Rich in protein, calcium, and omega-3s to aid in muscle recovery and support bone health. Lunch : Grilled Chicken Salad with Quinoa and Avocado Ingredients : Grilled chicken breast, mixed greens, cooked quinoa, sliced avocado, cherry tomatoes, and a lemon vinaigrette dressing.Benefits : Packed with protein, fiber, healthy fats, and essential vitamins for recovery and sustained energy. Afternoon Snack : Hummus with Carrot and Cucumber Sticks Ingredients : Homemade or store-bought hummus, carrot sticks, and cucumber sticks.Benefits : Provides fiber, protein, and healthy fats to keep you full between meals. Dinner : Baked Salmon with Sweet Potato and Asparagus Ingredients : Salmon fillet, sweet potatoes, asparagus, olive oil, and herbs (like dill or parsley). Benefits : Rich in omega-3s, vitamins, and minerals to support milk production and overall health. Dessert : Fresh Fruit Salad with a Dollop of Yogurt Ingredients : Mixed fresh fruits (like kiwi, mango, berries), and a spoonful of plain yogurt.Benefits : Provides hydration, vitamins, and a touch of natural sweetness to end your day. Tips for Maintaining a Balanced Postpartum Diet Eat Small, Frequent Meals: Aim for 5-6 small meals a day to keep your energy levels steady and support milk production. Prioritize Nutrient-Dense Foods: Focus on whole foods that are rich in essential nutrients to promote healing and sustain energy. Stay Hydrated: Drink plenty of water throughout the day, especially if breastfeeding, to maintain milk supply and overall health. Include a Variety of Foods: Eating a wide range of foods ensures you and your baby get all the necessary nutrients. Listen to Your Body : Pay attention to hunger and fullness cues, and don’t be afraid to eat more or less depending on how you feel. How I can Support Your Postpartum Nutrition I recognize that every new mom’s nutritional needs are unique. I offer personalized meal planning and nutrition guidance to support your postpartum recovery and breastfeeding journey. I help you find simple, delicious ways to nourish yourself and your baby. Contact Me Today! Schedule a free consultation to learn more about my postpartum nutrition support services and how I can help you thrive during this special time.
Your wedding dress is a key part of your big day, and how you feel in it is just as important as how it looks. Tailoring your pre-wedding workout to complement the style of your dress can not only enhance your appearance but also boost your confidence as you walk down the aisle. While I don't offer specific classes like yoga or HIIT, I can guide you through personalized workouts that are designed to focus on the areas most highlighted by your dress style. Here’s how you can prepare physically for different types of wedding dresses. 1. Strapless & Sleeveless: Focus on Arms and Shoulders For dresses that show off your arms and shoulders, you'll want to ensure these areas look toned and elegant. Exercises that target the biceps, triceps, and deltoids are essential. Incorporating resistance bands and light weights into your routine can help sculpt and define these muscles, giving you the confidence to showcase your upper body. 2. Backless: Strengthen Your Back A backless dress demands a strong, smooth back. Workouts focusing on the upper and lower back can enhance your posture and build the necessary strength to carry off this daring style. Rowing exercises and pull-ups can be incorporated into your fitness plan to ensure your back looks as stunning as the front. 3. Form-Fitting: Core and Cardio For mermaid or sheath dresses that hug your figure, a strong core and cardiovascular fitness are key to ensuring you look breathtaking. Planks, abdominal crunches, and rotational movements can tighten and define your midsection, while regular cardio sessions will help maintain a slim silhouette. 4. Full Skirt: Lower Body and Stamina Ballgowns and dresses with fuller skirts might seem forgiving, but they still require a strong lower body to carry the weight of the fabric gracefully. Squats, lunges, and leg presses will strengthen your legs and buttocks. Additionally, building endurance through longer cardio sessions will help you stay comfortable and energetic throughout the day. 5. Short or Tea-Length: Legs and Overall Tone If your dress shows off your legs, focusing on leg toning exercises will be beneficial. Additionally, maintaining an overall toned body will help these styles look their best. A mix of strength training and plyometrics can keep your legs shapely and your physique balanced. Integrating Your Dress Style Into Your Workout Plan As your personal trainer, I can help you tailor your workout plan to suit the style of your wedding dress. By understanding the specific requirements of your chosen dress style, we can focus on exercises that enhance those areas of your body most on display. Whether it’s strengthening your back, toning your arms, or sculpting your legs, I’ll guide you through targeted workouts that align with your aesthetic goals for the wedding. Remember, the goal of your pre-wedding fitness plan should not only be about looking great but also feeling strong, confident, and poised as you step into a new chapter of your life. Let's create a workout regimen that helps you achieve exactly that!
Planning a wedding is an exhilarating journey, filled with joy and celebration but also accompanied by a fair share of stress and anxiety. As you navigate through venue selections, guest lists, and endless decision-making, it's crucial to find moments of peace and clarity. Integrating mindfulness and meditation into your daily routine can be a game-changer, providing essential stress relief and enhancing your overall well-being as you approach your big day. Here's how you can use these practices to stay centered and enjoy every moment of your wedding preparation. The Benefits of Mindfulness and Meditation Mindfulness and meditation can significantly reduce stress and anxiety, which are common as you plan your wedding. These practices help you remain present and engaged, making you more aware of your thoughts and feelings without becoming overwhelmed by them. This heightened awareness can lead to better decision-making and a more enjoyable wedding planning experience. Simple Mindfulness Exercises 1. Focused Breathing: Take a few minutes each day to concentrate solely on your breathing. Sit in a quiet place, close your eyes, and breathe deeply. Inhale for a count of four, hold for a count of four, and exhale for a count of four. This simple technique can help reduce stress and refocus your mind. 2. Mindful Walking: Whether it's a walk through your neighborhood or a stroll in a local park, use this time to really engage with your surroundings. Notice the sounds, the smells, and the colors around you. This can turn a simple walk into a refreshing mental reset. 3. Engage Your Senses: Try activities that involve your senses, such as cooking a new recipe or gardening. Pay close attention to the textures, smells, and tastes. Engaging your senses can ground you in the present moment and push away stress-inducing thoughts. Incorporating Meditation into Your Routine 1. Guided Meditation: Use guided meditations available through apps or online. These sessions can range from five minutes to an hour and are led by experts who can help you find inner peace and balance. Even short sessions can be profoundly beneficial. 2. Visualization Techniques: Spend some time visualizing your perfect wedding day. Imagine it unfolding smoothly, filled with joy and laughter. Visualization not only helps in reducing stress but also creates a positive outlook. 3. Breath Awareness Meditation: This involves focusing on the natural rhythm of your breath. As you focus on your breathing, try to let go of other thoughts. Whenever you find your mind wandering, gently bring it back to your breath. This practice is particularly effective for calming the mind before bed or first thing in the morning. Making Mindfulness a Part of Your Wedding Journey As your personal trainer, I can help incorporate mindfulness techniques into your fitness routine. Combining physical exercise with mental health practices creates a holistic approach to your wellness, especially beneficial during this busy time. We can begin or end each session with a few minutes of meditation or incorporate mindful breathing exercises into our workouts. Mindfulness and meditation offer powerful tools for managing stress and enhancing your enjoyment of the wedding planning process. By making these practices a part of your daily routine, you can maintain your serenity, focus, and joy as you move closer to your special day. Let's embrace these techniques to ensure you feel as good on the inside as you will undoubtedly look on the outside.
Working out with your partner can not only be a fun bonding experience but also a great way to motivate each other to stay fit and healthy. As you both prepare for your special day, incorporating joint exercise routines can enhance your connection and ensure you're both looking and feeling your best. Here are some effective exercises that I recommend for couples, which can be included as part of your personal training sessions. 1. Partner Squats Stand back-to-back and link arms. Slowly lower down together into a seated position, as if you're sitting on a chair, keeping your thighs parallel to the ground. Hold for a few seconds, then push back up. This exercise is excellent for building lower body strength and requires you to work in sync, enhancing your coordination. 2. Medicine Ball Toss Grab a medicine ball and stand about two feet apart facing each other. One partner starts with the ball, lifting it overhead and tossing it to the other partner, who catches it at chest level before lowering it and bringing it back up to toss back. This exercise is great for your arms, core, and it adds a fun element to your workout. 3. Plank High-Fives Both partners face each other in the plank position, about an arm's length apart. Lift one hand and give a high-five to your partner. Alternate hands. This exercise strengthens the core and arms while requiring balance and stability, making you rely on each other to maintain the position. 4. Back-to-Back Wall Sit Stand back-to-back and walk your feet out while sliding down a wall until your knees are at a 90-degree angle, like sitting in an invisible chair. Hold this position for 30 seconds to one minute. This is a great way to build leg endurance and encourage each other to hold the position longer. 5. Side-by-Side Cardio Whether it's running, cycling, or rowing, doing cardio side-by-side can be highly motivating. Set goals for distance or speed and work together to achieve them. This shared experience can help strengthen your bond and keep both of you committed to your fitness goals. Integrating Couple's Workouts into Your Routine As your personal trainer, I can help integrate these couple’s exercises into your personalized fitness plan. Whether it’s during a session at the park or in your own living room, these workouts are designed to fit into your lifestyle and enhance both your physical and emotional well-being. Working out together not only helps you keep each other accountable but also builds a stronger partnership as you prepare for marriage. By incorporating these couple-focused exercises, you'll not only improve your fitness but also enjoy quality time together, making every workout session something to look forward to as your wedding day approaches. Let’s make fitness a joint adventure, enhancing your journey to the aisle with strength, love, and teamwork.
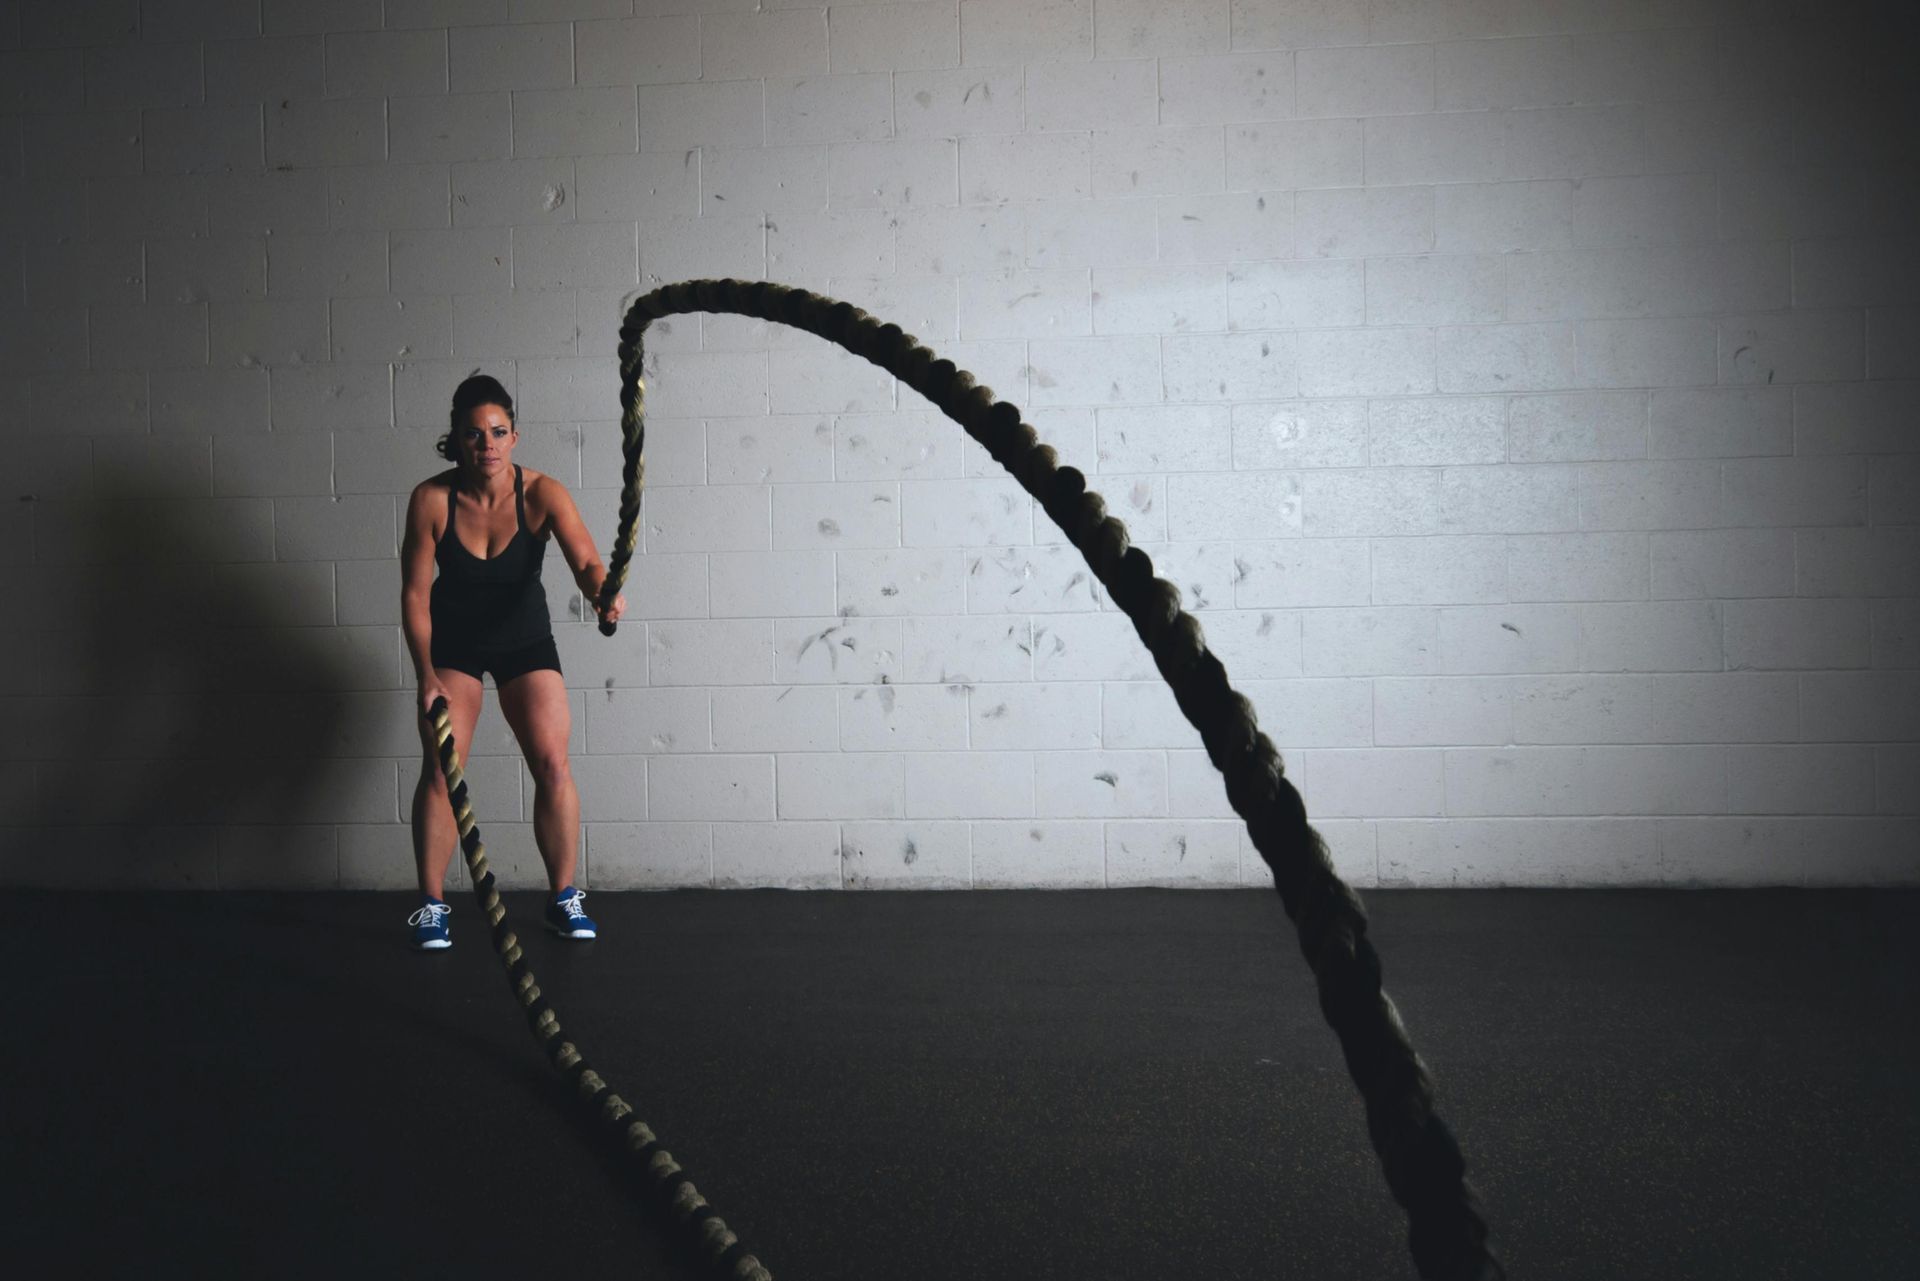
As you prepare for one of the biggest days of your life, staying active and fit is essential for feeling strong, confident, and radiant on your wedding day. Here are the top five bridal fitness trends that can be incorporated into your pre-wedding regimen, each offering fun, effective workouts that can be adapted to your specific goals. 1. Outdoor Group Fitness Taking your workout outdoors can be refreshing and invigorating. Group fitness sessions in a park or on a beach not only boost your vitamin D intake but also offer a change of scenery that can elevate your mood and motivation. These sessions can include a mix of cardio and strength exercises tailored to suit a bridal party, ensuring everyone stays engaged. 2. Strength Training Strength training is crucial for toning and sculpting the body. Focusing on key areas like arms, back, and shoulders can help you look your best in any wedding dress style. I can help customize your strength training regimen to ensure it aligns with your specific fitness goals and the demands of your upcoming nuptials. 3. Functional Training This trend involves exercises that help improve your daily movement skills, which can be especially beneficial during the hectic wedding planning phase. Functional training helps build strength, endurance, and flexibility through movements that mimic real-life activities, keeping you agile and energized. 4. High-Intensity Interval Training (HIIT) HIIT is perfect for brides looking to maximize their workout efficiency. These quick, intense bursts of exercise followed by short recovery periods help burn fat fast and can easily be incorporated into a busy pre-wedding schedule. As your personal trainer, I can guide you through tailored HIIT sessions that target your needs without taking up too much of your time. 5. Personal Training Sessions Personal training is essential for focusing on your unique needs as a bride-to-be. Whether you need to increase your stamina for the big day, tone specific areas, or simply manage stress through exercise, I can design a program that addresses your specific concerns and goals. Bridal Fitness with a Personal Touch These fitness trends can be adapted to your personal preferences and wedding preparation timeline. As your personal trainer, I’ll ensure that your regimen not only prepares you physically for your wedding but also boosts your confidence and overall well-being. Let’s work together to create a fitness plan that makes your journey to the altar both fit and fabulous. With the right approach, your pre-wedding fitness can be as memorable and uplifting as the event itself!

As your wedding day approaches, it’s not just the details of the event that need attention—your body and mind deserve care too. Nutrition plays a pivotal role in how you look and feel as you walk down the aisle. That’s why integrating a balanced, nutrient-rich diet into your bridal routine is as important as the perfect dress or venue. Here’s how you can eat well before your wedding, with a little help from my personal training services. Start with a Solid Foundation A balanced diet is key. Focus on incorporating a variety of foods that provide essential nutrients. Lean proteins like chicken, fish, and legumes are great for muscle repair and growth, while whole grains like quinoa and brown rice provide the energy you need to power through your day and your workouts. Don’t forget about the importance of fruits and vegetables, which supply vitamins and antioxidants to keep your skin glowing and your immune system strong. Hydration is Key Water is crucial for maintaining optimal health and helps keep your skin clear and hydrated. Aim for 8-10 glasses a day, and remember that herbal teas can be a soothing, hydrating option as well. If you struggle with water intake, try infusing your water with natural flavors like cucumber, lemon, or berries for a refreshing twist. Smart Snacking Snacking can be a pitfall or a powerhouse—choose wisely. Prepare snacks that are high in protein and fiber to keep you satisfied and energized. Almonds, Greek yogurt, and sliced veggies with hummus are excellent choices that are easy to prepare and can be packed for on-the-go moments. Avoiding high-sugar and overly processed snacks will help maintain your energy levels and avoid crashes. Customized Nutritional Coaching As part of my personal training services, I offer nutritional coaching tailored to your wedding goals. Whether you're looking to slim down, tone up, or simply maintain a healthy weight, I'll work with you to create a meal plan that complements your physical training regimen. This way, we can ensure that your body is getting exactly what it needs to look and feel its best on your big day. Pre-wedding Detox Plans For brides looking for a fresh start, a gentle pre-wedding detox can be a great way to reset your system. Focus on cutting out processed foods, sugars, and alcohol, which can contribute to bloating and fatigue. Instead, emphasize whole foods that are rich in nutrients and natural detoxifiers. I provide guidance and support through this process, ensuring that you approach your wedding day with vitality and vigor. Bridal Packages Consider my bridal fitness packages, which combine personal training with nutritional guidance. These packages are designed to target your specific needs and schedule, making it easier for you to stay on track amidst the hustle of wedding planning. From grocery shopping tutorials to full meal planning, I'm here to support every step of your nutritional journey. Eating well before your wedding is more than just a diet; it’s about creating a lifestyle change that will empower you for your big day and beyond. Let me help you navigate the complexities of nutritional planning with personalized advice and dedicated support, so you can focus on the joy of your upcoming nuptials.
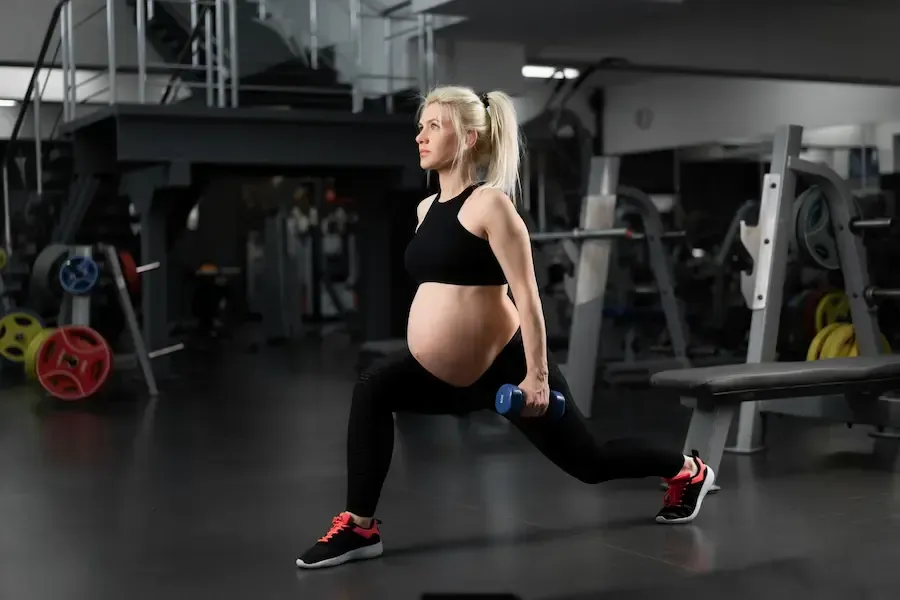
Avoid injury or overexertion with mild to moderate exercise. Staying fit during pregnancy is an important part of feeling your best. If yours is a low-risk pregnancy, and your doctor approves, you can continue to exercise and derive health benefits even from mild-to-moderate exercise routines. The American College of Obstetricians and Gynecologists recommends following these guidelines to ensure a healthy pregnancy for you and your baby. Stay consistent Exercise regularly (at least three times a week) -- not intermittently. Exercising three days a week is a good routine. Keep your exercise regimen in the mild-to-moderate range. Easy does it Avoid activities that require jumping motions or sudden changes in direction because these may strain your joints and injure you. Watch your back Don't exercise on your back after the first trimester. Also, avoid prolonged periods of motionless standing. Both actions can reduce blood flow to the uterus. Don't overexert yourself Be aware that you have less oxygen available for exercise. Stop exercising when you become fatigued, and don't exercise to the point of exhaustion. Keep your balance Avoid exercises that could cause a quick loss of balance or mild trauma to the abdomen. Eat a good diet Be sure you eat an adequate diet that allows you to gain 25 to 35 pounds over the nine months. Most pregnant women require an additional 300 calories a day. If you exercise regularly, you will probably require more. Include plenty of carbohydrates in your diet, as pregnant women use up this fuel source more quickly during exercise than nonpregnant women. Drink up! Drink plenty of water to keep you hydrated and prevent overheating. Water is essential for virtually every function of the body. The average person needs eight 8-ounce glasses a day. Drink with meals, as well as before, during and after exercise. During exercise, cold water is more readily absorbed. Get comfortable Wear comfortable, cool, and supportive clothing in layers that can be easily removed. Wear a bra that fits properly and supports your breasts. Keep cool Be mindful not to become overheated, especially in the first trimester. According to the American College of Obstetricians and Gynecologists, overheating, especially in the first trimester, may be a contributing factor to the development of birth defects. Drink plenty of fluids before and during exercise, wear layers of "breathable" clothing, don't exercise on hot, humid days, and don't immerse yourself in a hot tub or sauna. Avoid certain sports According to the Mayo Clinic, you'll want to avoid certain sports altogether while you're pregnant. These include activities at high altitudes and those that are associated with a risk of falling or colliding with another participant, such as horseback riding, climbing, and snow and water skiing. Also, avoid scuba diving because there's a risk that your oxygen intake could be compromised, and diving can put pressure on your organs and baby.

Almost any form of exercise will stimulate some degree of strength and muscle development. Unfortunately, misconceptions, myths, and misunderstandings plague the fitness industry, especially in regard to strength training. There is a huge attrition rate among those starting a strength training program primarily because most people are not taught the principles essential for a safe and effective program. This article is part five of a five part series discussing the very important principles and guidelines of a safe and effective strength training program. This article discusses exactly how to avoid the common mistake of overtraining. The previous article, part four of this five part series, discusses the importance of using the right amount of weight and number of repititions for each set, so you can achieve the results you desire. The following exercise guidelines are extremely important for your safety and the effectiveness of your strength training program. Avoid Overtraining If you feel burnt out, weak, and/or sore, you are probably overtraining. Not providing your muscles with enough rest will often prevent you from making improvements. Training the wrong muscle groups on consecutive days will also counteract your good results. Doing too many sets and exercises per muscle group will also cause overtraining. Remember that weightlifting, especially in an intense program, produces tissue microtrauma, those tiny tears in the muscles that temporarily decrease strength and cause varying degrees of muscle soreness. It is absolutely necessary to provide ample rest time between successive training sessions. Muscles generally require about 48 hours for the resting and rebuilding process before you work them again. You should never train the same muscle groups on two or more days in a row (abdominals are the exception). Hypothetically then, you would do your chest, shoulders, triceps, and abdominals on Monday; on Tuesday you would train your legs, back, biceps, and abdominals; you would take Wednesday off to give all your muscle groups extra rest; on Thursday you'd do chest, shoulders, triceps, and abdominals again; and on Friday you'd do legs, back, biceps, and abdominals again. This would allow two days (48 hours) of rest for each muscle between training days. Those of you who train very intensely, would benefit greatly by taking even more rest time between sessions. A week does not have to be limited to only seven days--you can expand it to eight, nine, or even ten days. Think about it: why not? Day one could consist of chest, shoulders, triceps, (pushing muscles) and abdominals on Monday. Take Tuesday off. On day two, Wednesday, the routine could consist of legs, back, biceps, (pulling muscles) and abdominals. Take Thursday off. On Friday you do chest, shoulders, triceps, and abdominals again--and so on. This is especially important when mixing pushing and pulling muscles for different sessions. For example, if you train your chest on Monday and then triceps the next day, your triceps never really get a complete rest because they are indirectly trained with your chest on Monday and directly trained on Tuesday. But if you split up chest/shoulders/triceps or back/biceps, working them on different days, you can implement this eight day program for maximum muscle resting time. Remember: always allow your muscles a chance to grow, especially when you are feeling overtrained. If needed, give yourself an extra day off to grow. Never feel guilty about skipping a workout. That extra rest could be exactly what your body needs. Many people make the mistake of doing too many sets per exercise, and/or doing too many exercises per muscle group. It's very common for people who want great muscle size and strength gains to simply do too much for each muscle group and overtrain to the point where they do more harm than good. A common weightlifting recommendation is to do at least four sets for each exercise and at least four exercises for each muscle group. This idea that "more is better" is a big misconception in the strength training industry and is recommended in many "muscle magazines" and other sources. But when you see Mr. or Ms. Olympia in muscle magazines describing their workouts of four to five sets per exercise and four to five exercises per muscle group, do not be fooled into thinking that if you want their results you have to do what they do. These are professional body builders, quite likely to be on steroids; they can get away with these very intense long programs because their muscles are able to rebuild very quickly. If you are not on steroids--and for the sake of your health I hope you are not--your muscles will not be able to rebuild themselves quickly enough to make gains. For each of the large muscle groups in the body such as back, chest, shoulders, quadriceps, and hamstrings, two to four exercises for each muscle is enough. For the smaller muscle groups such as biceps, calves, trapezius, etc. one to three exercises are enough. Because your back, for example, has specific muscles that need to be isolated, it is important that of the three exercises you perform, you do one that primarily targets each of the three areas: upper-middle back, lats., and lower back. When you're doing two to four exercises for each muscle group, make sure you don't duplicate movements of specific muscle groups. For example, it makes no sense to do three sets of Bench Press using a barbell and then do three sets of Bench Press using dumbbells or Push-ups. Each of these exercises requires exactly the same movement and works the same specific muscle. Instead, it would make much more sense to do bench press for overall middle chest (either barbell, dumbbell, or machine); do incline bench press for upper chest; and do dips for lower-outer chest. One point--maybe the most important of all for ongoing strength training programs--that is absolutely imperative to understand and implement into your training regimen is the need to overcome training plateaus. Ideally, you want to always be going through a momentum phase in which you try something new and "shock" your muscles, forcing them to make gains. Eventually however, you will come to a point in your training where you either get bored or stop seeing results. When this happens it is absolutely crucial that you change what you are doing; this is when you need to get creative by incorporating something new into your program. You can make effective changes in your program in many ways: try new or alternate exercises, change the order that you train your muscles or the order of the exercises, and so forth. I hope you have found the information in these five part series of articles helpful. You now have the knowledge to achieve the results you desire and the benefits your body deserves. Your greatest challenge, however, is not learning new exercises or the proper technique; it's not learning how many sets or reps to do or how much weight to use. Nor is it deciding when or how to change your routine. The greatest challenge facing you at this moment is deciding whether you are willing to take action and make strength training a priority. When you begin achieving great results, the excitement and fun you experience will make the change well worth the effort. Action creates motivation! Good luck: I hope you enjoy all the wonderful benefits of an effective strength training program.

Falls are a significant concern for older adults, often leading to serious injuries and a decrease in quality of life. However, incorporating fitness into daily routines can be a powerful tool in preventing these accidents. In this blog post, we'll explore how targeted exercises and physical activity can help seniors improve their balance, strength, and overall safety. The Importance of Fall Prevention Falls are the leading cause of injury-related deaths among older adults, and they can result in fractures, head injuries, and decreased mobility. Many falls are preventable, and enhancing physical fitness is a key strategy in reducing the risk. By focusing on exercises that improve strength, balance, and flexibility, seniors can build resilience against falls and maintain independence. Key Fitness Strategies for Fall Prevention 1. Strength Training Why It Matters: Strength training is crucial for maintaining muscle mass and bone density, both of which are essential for stability and fall prevention. Strong muscles support joints and improve overall coordination. Recommended Exercises: Chair Squats: Stand in front of a chair, lower yourself into a sitting position, then rise back up. This exercise strengthens the legs and improves balance. Wall Push-Ups: Perform push-ups against a wall to build upper body strength without straining the joints. 2. Balance Exercises Why It Matters: Improving balance helps prevent falls by enhancing your ability to stay upright and respond to sudden changes in direction. Recommended Exercises: Heel-to-Toe Walk: Walk in a straight line, placing the heel of one foot directly in front of the toes of the other. This exercise challenges and improves balance. Single-Leg Stands: Stand on one leg for 10-15 seconds, then switch legs. To increase difficulty, try this exercise near a wall or chair for support. 3. Flexibility Training Why It Matters: Flexibility exercises increase the range of motion in your joints and can reduce the risk of falls by improving your ability to move freely and easily. Recommended Exercises: Seated Leg Stretch: Sit on a chair, extend one leg out in front of you, and gently reach towards your toes. This stretches the hamstrings and lower back. Gentle Yoga: Yoga routines that focus on stretching and controlled movements can improve flexibility and balance. 4. Aerobic Activity Why It Matters: Regular aerobic activity enhances cardiovascular health, which supports overall physical function and endurance. Recommended Activities: Walking: A daily walk around the neighborhood or on a treadmill can boost stamina and improve coordination. Water Aerobics: Exercising in water reduces impact on the joints while providing resistance to strengthen muscles and improve balance. Creating a Safe Exercise Routine 1. Consult a Healthcare Professional: Before starting any new exercise program, it's important to consult with a healthcare provider, especially if you have existing health conditions. 2. Start Slowly: Begin with lower-intensity exercises and gradually increase the difficulty as your fitness improves. 3. Use Proper Equipment: Wear supportive footwear and use safety equipment, such as handrails or exercise bands, to prevent injuries. 4. Stay Consistent: Aim for at least 150 minutes of moderate-intensity aerobic activity per week, combined with strength and balance exercises. Additional Tips for Fall Prevention Home Safety: Ensure your living environment is free from tripping hazards. Remove clutter, secure loose rugs, and install grab bars in key areas like the bathroom. Regular Check-Ups: Keep up with regular health check-ups to monitor vision and medication side effects, which can impact balance. Stay Socially Engaged: Social activities and maintaining an active lifestyle can help improve mental and physical well-being. Conclusion Incorporating fitness into your daily routine is a proactive way to prevent falls and maintain independence as you age. By focusing on strength, balance, flexibility, and aerobic activity, seniors can significantly reduce their risk of falls and enjoy a healthier, more active lifestyle. Remember, it's never too late to start, and every step taken towards fitness is a step towards greater safety and well-being. Feel free to share your own tips or experiences in the comments below! How has fitness helped you or your loved ones in preventing falls?

Gestational diabetes is a condition brought about by high blood glucose levels that remain high during pregnancy. The health of the fetus and mother as well as the development of the fetus can be adversely affected by this form of diabetes. Although it seems as if the pregnancy causes the diabetic response in some women there have been studies done which show they may have been predisposed to diabetes as they develop type 2 diabetes later on in life. A gestational diabetes diet plan is critical to properly managing the affects of this disease. Routine screening for gestational diabetes is recommended during the second trimester for all pregnant women to help limit the negative impacts it can have on mother and baby. If it is not controlled it can lead to pregnancy-induced hypertension, premature birth, large fetus size, congenital abnormalities, future obesity and diabetes in the infant, and other birth complications. A gestational diabetes diet requires dietary modifications that the mother may not be used to but to control this form of diabetes it is essential. This is accomplished through individually developed dietary prescriptions based on metabolic nutrition and lifestyle requirements. Basic changes include reduced intake of simple sugars such as white table sugar and syrups. The simple sugars are replaced with more complex carbohydrates with a balanced intake of nutrients, particularly with the carbohydrates, during the day. To make starting this type of gestational diabetes diet plan easier a registered dietician will use exchange lists to make their clients meal planning easier. Exchange lists were first developed for diabetic meal planning but they have become a basic tool for almost all food guides and dietary recommendations. Another system to control diabetes, carbohydrate counting, has recently begun to see more widespread use. This system allows the client to keep track of carbohydrate intake during the course of the day. An overall gestational diabetes diet plan takes into account the physical, psychosocial, and educational requirements. For the woman with this form of diabetes reliance on her health care providers to help manage her condition is vitally important. Her registered dietician has the primary responsibility for developing and teaching her the individualized dietary plan that will work best for her. Nurses at her doctor's office and in the hospital help reinforce these dietary needs and also are responsible for teaching her how to effectively monitor blood glucose levels and administer insulin if needed. By working together the pregnant woman and her health care team can successfully manage and overcome the risks posed by gestational diabetes.

Many Americans view a healthy lifestyle as something difficult to attain--and something that's not much fun. Traditional diets have taught us that to lose weight, we must count calories, keep track of everything we eat, and deprive ourselves by limiting the amount--and kinds--of foods we eat. Diets tell us exactly what and how much food to eat, regardless of our preferences and individual relationships with hunger and satiety. Dieting can help us lose weight (fat, muscle, and water) in the short term but is so unnatural and so unrealistic that it can never become a lifestyle that we can live with, let alone enjoy! While very few diets teach healthy low-fat shopping, cooking, and dining-out strategies, many offer unrealistic recommendations and encourage health-threatening restrictions. Even more important, diets don't teach us the safest, most effective ways to exercise; they don't teach us how to deal with our cravings and our desires, or how to attend to our feelings of hunger and fullness. Eventually, we become tired of the complexity, the hunger, the lack of flavor, the lack of flexibility, the lack of energy, and the feeling of deprivation. We quit our diets and gain back the weight we've lost; sometimes we gain even more! Each time we go on another diet of deprivation, the weight becomes more difficult to lose, and we become even more frustrated and discouraged. Then we eat more and exercise less, causing ourselves more frustration, discouragement, depression. Soon we are in a vicious cycle. We begin to ask ourselves, "Why bother?" We begin to blame ourselves for having no will power when what we really need is clear, scientifically-based information that will help us develop a healthier lifestyle we can live with for the rest of our lives. Deliberate restriction of food intake in order to lose weight or to prevent weight gain, known as dieting, is the path that millions of people all over the world are taking in order to reach a desired body weight or appearance. Preoccupation with body shape, size, and weight creates an unhealthy lifestyle of emotional and physical deprivation. Diets take control away from us. Many of us who diet get caught in a "yo-yo" cycle that begins with low self-acceptance and results in structured eating and living because we lack trust in our body and are unwilling to listen and adhere to our body's signals of hunger and fullness. On diets, we distrust and ignore internal signs of appetite, hunger, and our need to be physically and psychologically satisfied. Instead, we depend on diet plans, measured portions, and a prescribed frequency for eating. As a result, many of us have lost the ability to eat in response to our physical needs; we experience feelings of deprivation, then binge, and finally terminate our "health" program. This in turn leads to guilt, defeat, weight gain, low self-esteem, and then we're back to the beginning of the yo-yo diet cycle. Rather than making us feel better about ourselves, diets set us up for failure and erode our self-esteem. The attitudes and practices acquired through years of dieting are likely to result in a body weight and size obsession, low self-esteem, poor nutrition and excessive or inadequate exercise. Weight loss from following a rigid diet is usually temporary. Most diets are too drastic to maintain; they are unrealistic and unpleasant; they are physically and emotionally stressful. And most of us just resume our old eating and activity patterns. Diets control us; we are not in control. People who try to live by diet lists and rules learn little or nothing about proper nutrition and how to enjoy their meals, physical activity, and a healthy lifestyle. No one can realistically live in the diet mode for the rest of their life, depriving themselves of the true pleasures of healthy eating and activity. We Don't Fail Diets; They Fail Us! Decades of research have shown that diets, both self-initiated and professionally-led, are ineffective at producing long-term health and weight loss (or weight control). When your diet fails to keep the weight off, you may say to yourself, "If only I didn't love food so much . . . If I could just exercise more often . . . If I just had more will power." The problem is not personal weakness or lack of will power. Only 5 percent of people who go on diets are successful. Please understand that we are not failing diets; diets are failing us. The reason 95 percent of all traditional diets fail is simple. When you go on a low-calorie diet, your body thinks you are starving; it actually becomes more efficient at storing fat by slowing down your metabolism. When you stop this unrealistic eating plan, your metabolism is still slow and inefficient that you gain the weight back even faster, even though you may still be eating less than you were before you went on the diet. In addition, low-calorie diets cause you to lose both muscle and fat in equal amounts. However, when you eventually gain back the weight, it is all fat and not muscle, causing your metabolism to slow down even more. Now you have extra weight, a less healthy body composition, and a less attractive physique. Diets require you to sacrifice by being hungry; they don't allow you to enjoy the foods you love. This does not teach you habits which you can maintain after the diet is over. Most diet programs force you to lower your caloric intake to dangerously low levels. The common theory is that if you eat fewer calories than you burn, you will lose weight. But when you eat fewer calories than your body needs to maintain its life-sustaining activities, you're actually losing muscle in addition to fat. Your body breaks down its own muscles to provide the needed energy for survival. Traditional diets which use calorie restriction to produce weight loss are no longer appropriate. Most weight-loss programs measure success solely in terms of the number of pounds lost per weight loss attempt. Diets don't take into account the quality of the process used to achieve that weight loss or the very small likelihood of sustained weight loss. For long-term good health, you need to move away from low-calorie diets and focus on enjoyable physical activity and good nutrition. Exercising regularly and eating lean-supporting calories, protein and carbohydrates, and reducing fat-supporting calories will not only help you look and feel better, it will also significantly reduce your risk of disease. America spends billions of dollars on different ways to fix people. If we focused more on prevention and on improving our day-to-day behaviors, we could cut health care costs in half. Contrary to popular belief, leading a healthy lifestyle doesn't have to be difficult; it doesn't have to painful or time-consuming. Making gradual, simple changes in your diet and physical activity will make great improvements in your health and well-being, and they can drastically reduce your risk of disease. If your weight management program is to be a success, everything you eat and every exercise you do must be a pleasurable experience. If you're not enjoying yourself, it is unlikely that you'll continue your program. It's that simple. These small, gradual changes are not painful or overwhelming but rather the core of an exciting lifestyle that you will look forward to. Take the frustration, guilt, and deprivation out of weight management, and allow yourself to adopt gradual, realistic changes into your life that will make healthy eating and physical activity a permanent pleasure. You will soon discover what your body is capable of and begin to look, act, and feel your very best. Good luck and enjoy all the wonderful benefits of a healthy, active lifestyle.

For maximum effectiveness and safety, cardiovascular exercise has specific instructions on the frequency, duration, and intensity. These are the three important components of cardiovascular exercise that you really need to understand and implement in your program. In addition, your cardiovascular program should include a warm-up, a cool-down, and stretching of the primary muscles used in the exercise. The last article, part one of this two part series, explained the proper methods of warming-up, stretching, and cooling-down and discussed the frequency and duration of a sound cardiovascular routine. You learned that cardiovascular exercise should be done a minimum of three times a week, a minimum of 20 minutes per session and should be done after a 5-10 minute warm-up (at a low intensity of 50-60% of max HR) and a 5-10 minute cool-down (at a low intensity of 50-60% of max HR) should follow. Once your muscles are warm (after warm up) and after the cardiovascular exercise, you should stretch those muscles used in the exercise. This article, part two, discusses how to monitor exercise intensity and heart zone training. There are several ways to monitor the exercise intensity. The best way to test the intensity is to take your heart rate during the exercise, within the first 5 minutes of your cardiovascular exercise session and again just before the cool-down. There are two ways in which you can check your heart rate during exercise. The most accurate one is to purchase a heart-rate monitor that you strap around your chest. It will give you feedback on a digital watch that tells you exactly what your heart rate is at a specific time in the exercise session. The other way to obtain your heart rate is by palpating (feeling) either the carotid artery, the temporal artery, or the radial artery. The easiest site is either the cartoid or the radial artery. The cartoid artery may be felt by gently placing your index finger on your neck, between the middle of your collar bone and jaw line. Palpating the radial artery is done by placing your index and middle finger on the underside and thumb-side of your wrist. When you're taking your heart rate you measure it in beats per minute (counting the number of beats for 60 seconds). For convenience, many people take their pulse for 6 seconds and multiply that number by 10, or simply add a 0 behind the number just obtained. So, if in 6 seconds you counted 12 beats, that would mean your heart rate was 120 beats per minute (bpm). Although counting for 6 seconds is most convenient, keep in mind that the longer the time interval used, the more accurate the results will be. For example, counting your heart rate for 30 seconds and then multiplying that number by 2 will give a slightly more accurate reading than counting your heart rate for 15 seconds and multiplying by 4, or 10 seconds and multiplying by 6. What ever time interval you use, be consistent. Heart Zone Training How do you know if you are training too intensely or not intensely enough for what you want to achieve? This is where Heart Zone Training comes in. Refer to the chart below. The top of the chart reads "Maximum Heart Rate," which is 100% of your heart rate (the fastest your heart will beat). This is different for everyone. To use Heart Zone Training you must first determine your maximum heart rate (max HR). You can determine your max HR one of two ways. One way is to use the age predicted max HR formula, whereby you subtract your age from 220. So, if you are 40 years old, your predicted max HR would be 180 bpm. The other method, which is much more accurate and more individualized, is actually having a medical or fitness professional administer a max HR test for you, which is usually done on a stationery bicycle or treadmill for several minutes and requires very hard work. Thus, only those cleared by a physician should do this test. We do not explain how to administer this test because only trained professionals should do so. Please refer to the Global Health and Fitness Personal Training Directory for professionals in your area (may or may not be trained in administering a max HR test). Once you have determined your max HR, you will need to decide what zone you want to train at. There are five different training zones separated by 10% increments, each having different characteristics and benefits. Healthy Heart Zone The first zone is called the Healthy Heart Zone. This is 50-60% of your max HR. This is the easiest and most comfortable zone within which to train and is the one that is best for people who are just starting an exercise program or have low functional capacity. Those of you who are walkers most likely train at this zone. Although this zone has been criticized for not burning enough total calories, and for not being intense enough to get great cardiorespiratory benefits, it has been shown to help decrease body fat, blood pressure and cholesterol. It also decreases the risk of degenerative diseases and has a low risk of injury. In this zone, 10% of carbohydrates are "burned" (used as energy), 5% of protein is burned and a whopping 85% of fat is burned. Fitness Zone The next zone is the Fitness Zone, which is 60-70% of your max HR. Once again, 85% of your calories burned in this zone are fats, 5% are proteins and 10% are carbohydrates. Studies have shown that in this zone you can condition your fat mobilization (getting fat out of your cells) while conditioning your fat transportation (getting fat to muscles). Thus, in this zone, you are training your fat cells to increase the rate of fat release and training your muscles to burn fat. Therefore, the benefits of this zone are not only the same as the healthy heart zone training at 50-60% but you are now slightly increasing the total number of calories burned and provide a little more cardiorespiratory benefits. You burn more total calories at this zone simply because it is more intense. Aerobic Zone The third zone, the Aerobic Zone, requires that you train at 70-80% of your max HR. This is the preferred zone if you are training for an endurance event. In this zone, your functional capacity will greatly improve and you can expect to increase the number and size of blood vessels, increase vital capacity and respiratory rate and achieve increases in pulmonary ventilation, as well as increases in arterial venous oxygen. Moreover, stroke volume (amount of blood pumped per heart beat) will increase, and your resting heart rate will decrease. What does all this mean? It means that your cardiovascular and respiratory system will improve and you will increase the size and strength of your heart. In this zone, 50% of calories burned are from carbohydrates, 50% are from fat and less than 1% is from protein. And, because there is an increase in intensity, there is also an increase in the total number of calories burned. Anaerobic Zone The next training zone is called the Threshold or Anaerobic zone, which is 80-90% of your max HR. Benefits include an improved VO2 maximum (the highest amount of oxygen one can consume during exercise) and thus an improved cardiorespiratory system, and a higher lactate tolerance ability which means your endurance will improve and you'll be able to fight fatigue better. Since the intensity is high, more calories will be burned than within the other three zones. Although more calories are burned in this zone, 85% of the calories burned are from carbohydrates, 15% from fat and less than 1% are from protein. Red-line Zone The last training zone is called the Redline Zone, which is 90-100% of your max HR. Remember, training at 100% is your maximum heart rate (maximum HR), your heart rate will not get any higher. This zone burns the highest total number of calories and the lowest percentage of fat calories. Ninety percent of the calories burned here are carbohydrates, only 10% are fats and again less than one percent is protein. This zone is so intense that very few people can actually stay in this zone for the minimum 20 minutes, or even five minutes (you should only train in this zone if you are in very good shape and have been cleared by a physician to do so). Usually, people use this zone for interval training. For example, one might do three minutes in the Aerobic Zone and then one minute in this Redline Zone and then back to the Aerobic Zone (this is called interval training and will be discussed further in a future article). I hope you have found the information in this article helpful. You now have the knowledge to achieve the results you desire and the benefits your body deserves. Your greatest challenge, however, is not learning new cardiovascular exercises or the proper technique; it's not learning the heart rate zone to train at for your goals and interests or how to monitor the intensity. Nor is it deciding when to try new cardiovascular exercises. The greatest challenge facing you at this moment is deciding whether you are willing to take action and make time for yourself and make cardiovascular exercise a priority. When you begin achieving great results, the excitement and fun you experience will make the change well worth the effort. Action creates motivation! Good luck: I hope you enjoy all the wonderful benefits of an effective cardiovascular exercise program.
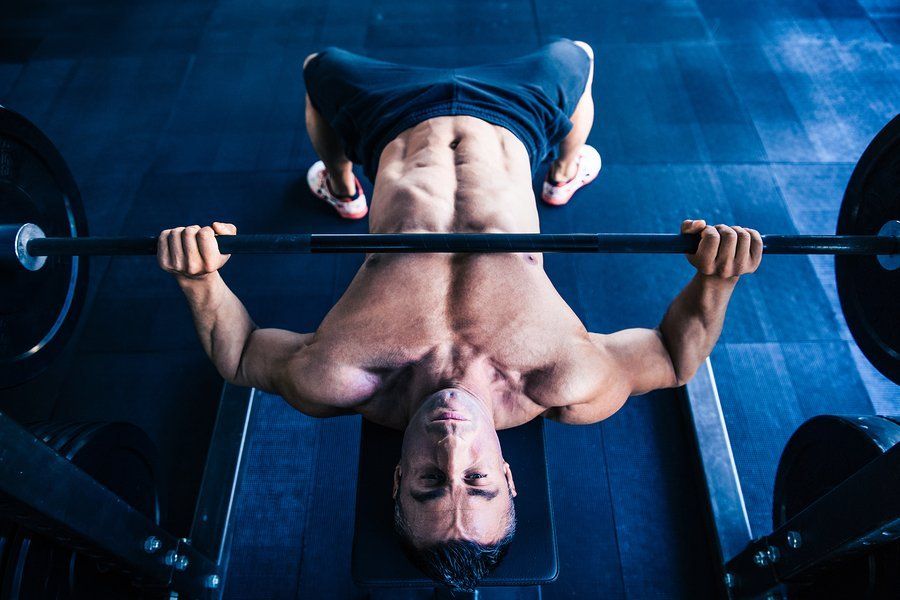
Almost any form of exercise will stimulate some degree of strength and muscle development. Unfortunately, misconceptions, myths, and misunderstandings plague the fitness industry, especially in regard to strength training. There is a huge attrition rate among those starting a strength training program primarily because most people are not taught the principles essential for a safe and effective program. This article is part four of a five part series discussing the very important principles and guidelines of a safe and effective strength training program. This article discusses the amount of weight you should use and the number of repititions you should do for the results you desire. I'll also explain how to gradually increase the weight you use to stimulate further gains. The previous article, part three of this five part series, discussed the importance of proper lifting technique, exercising through the full range of motion, the proper exercise sequence, and the correct number of sets to do for what you're trying to achieve. The following exercise guidelines are extremely important for your safety and the effectiveness of your strength training program. Relationship Between Resistance and Repetitions It's important to understand the inverse relationship between exercise resistance and exercise repetitions. When exercising to the point of muscle fatigue, most people can complete about six repetitions with 85 percent of maximum resistance. "Maximum resistance" is the most weight you can lift one time, in good form. Most people can complete eight repetitions with 80 percent of maximum resistance, 10 repetitions with 75 percent of maximum resistance, and 12 repetitions with 70 percent of maximum resistance. For most people (those seeking muscle strength and tone), 8-12 repetitions with 70-80 percent of maximum resistance is a sound training recommendation for strength and muscle development. Most people do not bother with finding their one repetition maximum for each lift to obtain the appropriate weight for each set of 8-12 repetitions. This would get pretty tedious especially when you are learning a new exercise. Really, the best and easiest way to figure out how much weight you should use on each lift is to begin by taking your best conservative guess. After you have warmed up by using a light weight for 12 or 20 reps, choose a weight for your next set that will challenge you for your goal number of repetitions. If you are not sure what that weight should be, choose a weight that is likely to be too light, rather than making the mistake of going too heavy and not reaching your desired number of repetitions. For example, say you are trying to decide the proper weight for a set of 12 repetitions on the Shoulder Press. Choose a light, conservative weight slightly heavier than your warm-up and do the set 12 times (repetitions or reps). When you come to your twelfth repetition, if you feel as though you can perform another repetition or two, while still using good form, you might as well do that (to further promote blood flow to the shoulder muscle). Since you know that the weight you chose was a little too light (your 12th repetition was not a challenge), next time choose a slightly heavier weight that will challenge you for all twelve repetitions, or whatever your goal number of repetitions happens to be. Important Note: Your strength may gradually decline as you progress through your routine. For example, on your first set (after warm-up) of the Bench Press you did 12 reps with 150 pounds--this would force a good amount of blood and fatigue your chest muscles. If for your second set you're trying to figure out the appropriate weight for 10 reps, you may or may not want to slightly increase the weight. That is, 150 pounds might be a challenging weight for 10 reps because your muscles are a little fatigued from the first set. So, try to be intuitive and pick an appropriate weight based not only on the weight you used on the previous set, but also how fatigued your muscles feel. It is important that the weight you choose for each set challenges you for all of your desired repetitions, whether the number is 6, 8, 10, or 12 repetitions. Similarly, if you choose a weight that does not allow you to perform all the desired repetitions in good form, do as many as you can and choose a lighter weight for the next set. It is a good idea to keep a record of the weights you use on each lift so that when you perform the same exercise at another workout you know what weight to use on each exercise set. In general, if your goal is to get notably bigger and significantly stronger, you will want to do fewer reps with more weight, so 6-10 reps is a good target for you on most exercises. Sometimes, on exercises like the bench press and squats, even as low as 2 reps will be enough. If you are more concerned with creating muscle tone, your rep number should be in the range of 10-15. Most people's goal is a combination of muscle strength, size and tone; the target number for these folks should stay between 8-12 repetitions. Remember, however, that whether you are going for 6 reps or 15, always pick a weight that will challenge you for the full set. Progressive Resistance As your muscles adapt to a given exercise resistance (weight), that resistance must be gradually increased to stimulate further gains. The key to strength and muscle development is progressive resistance, which is also called "exercise progression," or "the overload principle." This is the gradual and continual addition of weight to the exercise over time, as the previous weights become too easy to lift, so that your muscles are continually forced to work harder and thus increase muscle strength, size and tone. For example, in the Front Shoulder Press you might start out pressing (lifting) 20 pounds. After two or three weeks you may find that pressing 20 pounds has become too easy, and that you can do more than your chosen number of repetitions with little or no difficulty. The progression principle demands that as soon as the weight you are using is no longer a challenge, you must raise it. You progressively increase the weight you use for a lift so that you continue to make gains in muscle tone, size, and strength. It is important that you increase the weight only if the previous weight is too light; increasing the weight to push yourself harder can result in poor form and definitely increases the risk of injury. Please understand that an increase in repetitions is an increase in strength. Many people think strength gains are only obtained when they increase the weight. But if you have increased the number of repetitions you can do with good form, you have increased your strength and more than likely, your muscle size and tone as well. Please check back for Part five, where I'll discuss exactly how to avoid the common mistake of overtraining. Until then, be sure to use the right amount of weight and number of repititions for each set you do so you can achieve the results you desire. Good luck, and enjoy all the wonderful benefits of strength training.